Novelty Holiday Poppers/Crackers DIY
/
These surprise poppers or otherwise known as crackers are a staple of British tradition for decades. It is a party favor that began in England but has grown in popularity as a symbol of celebration around the holiday season! I just love these poppers and have bought them for the kids in the past. They love opening them up and having a surprise inside! Normally however, the surprise is the paper crown (tissue party hat) or a motto (joke or riddle)… Read more here! The best part of this whole thing is that the kids get to pull from both ends and a loud pop/crack happens and out comes the present!! It really is so fun and exciting. That is why I wanted to create one of my own for my kids that is more personalized and contains a real gift! Something similar to a stocking stuffer. But another fun way to open a present during the holidays!.
The process was simple and the results are gorgeous! See below for all the details on how to make them yourself.
Small Gifts are Brycen- Pop Grip for his iPhone, Brinkley- Earrings and Patches for her backpack, Brent- Matchbox cars.
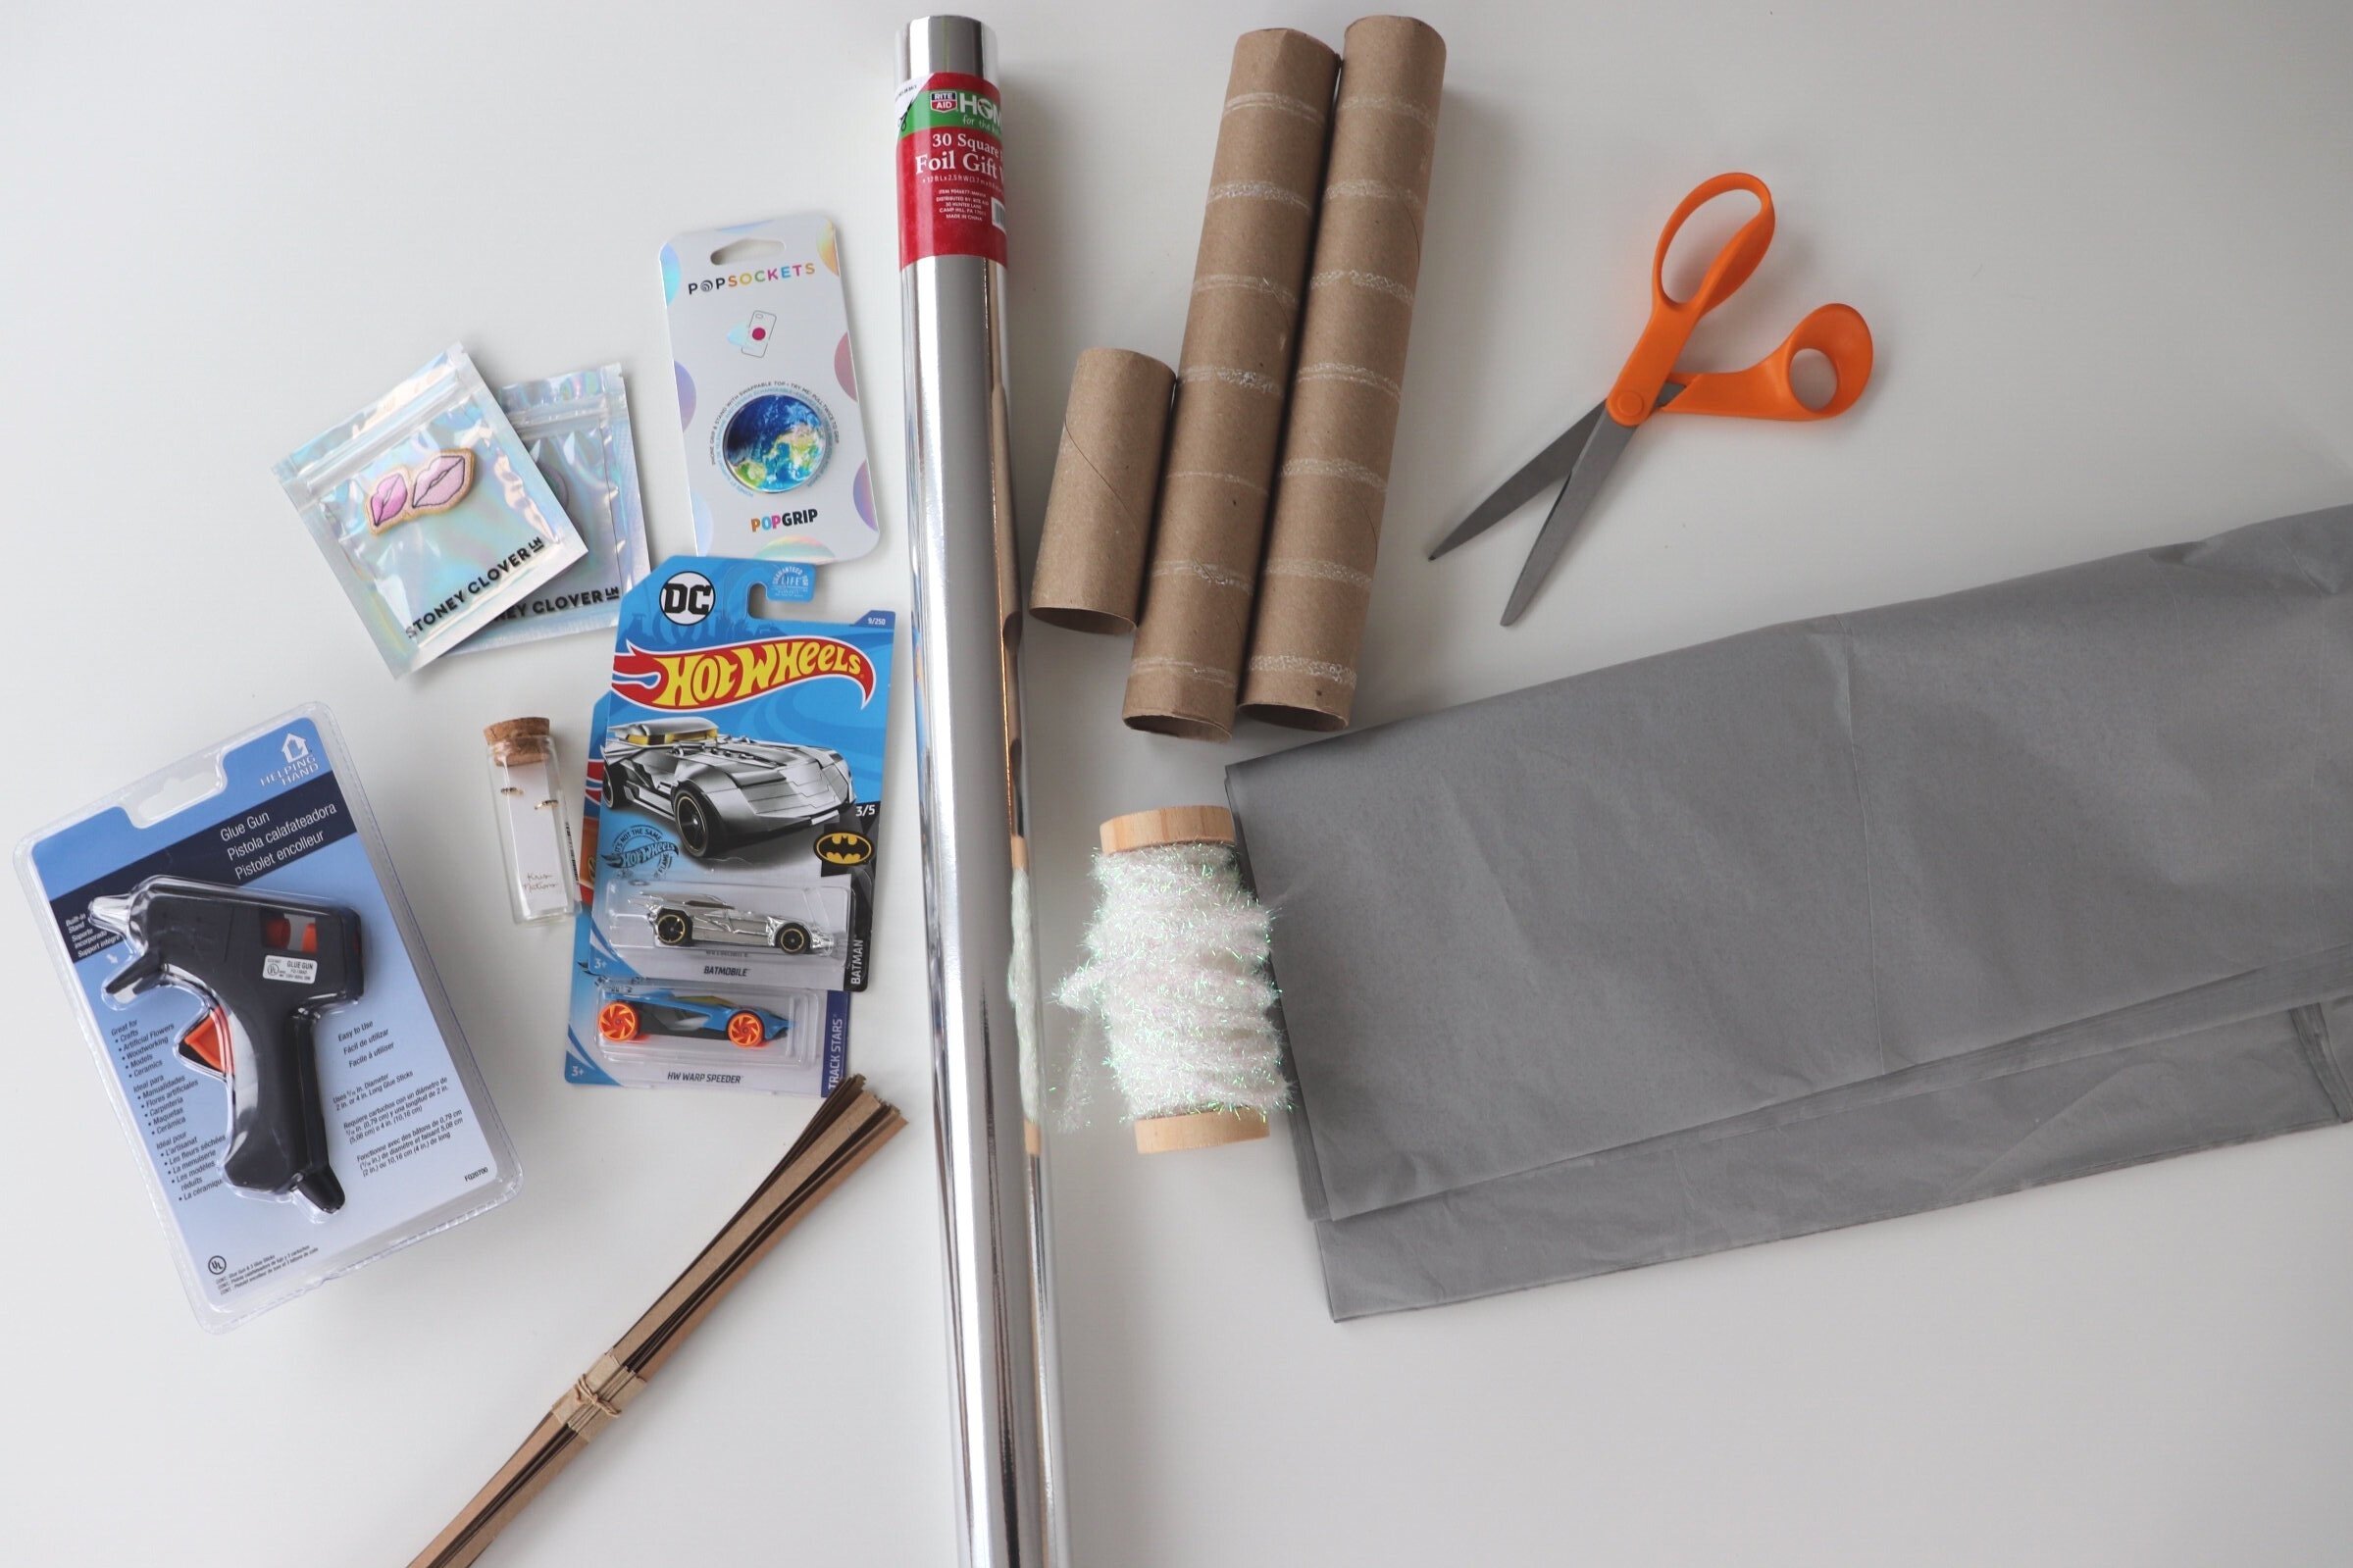
Here is what you’ll need:
Papertowel cardboard center (cut in half)
Tissue Paper & Festive Wrapping Paper
Glue Gun
Small Gift that will fit inside
Festive String
Step 1: Arrange all your materials on the table.
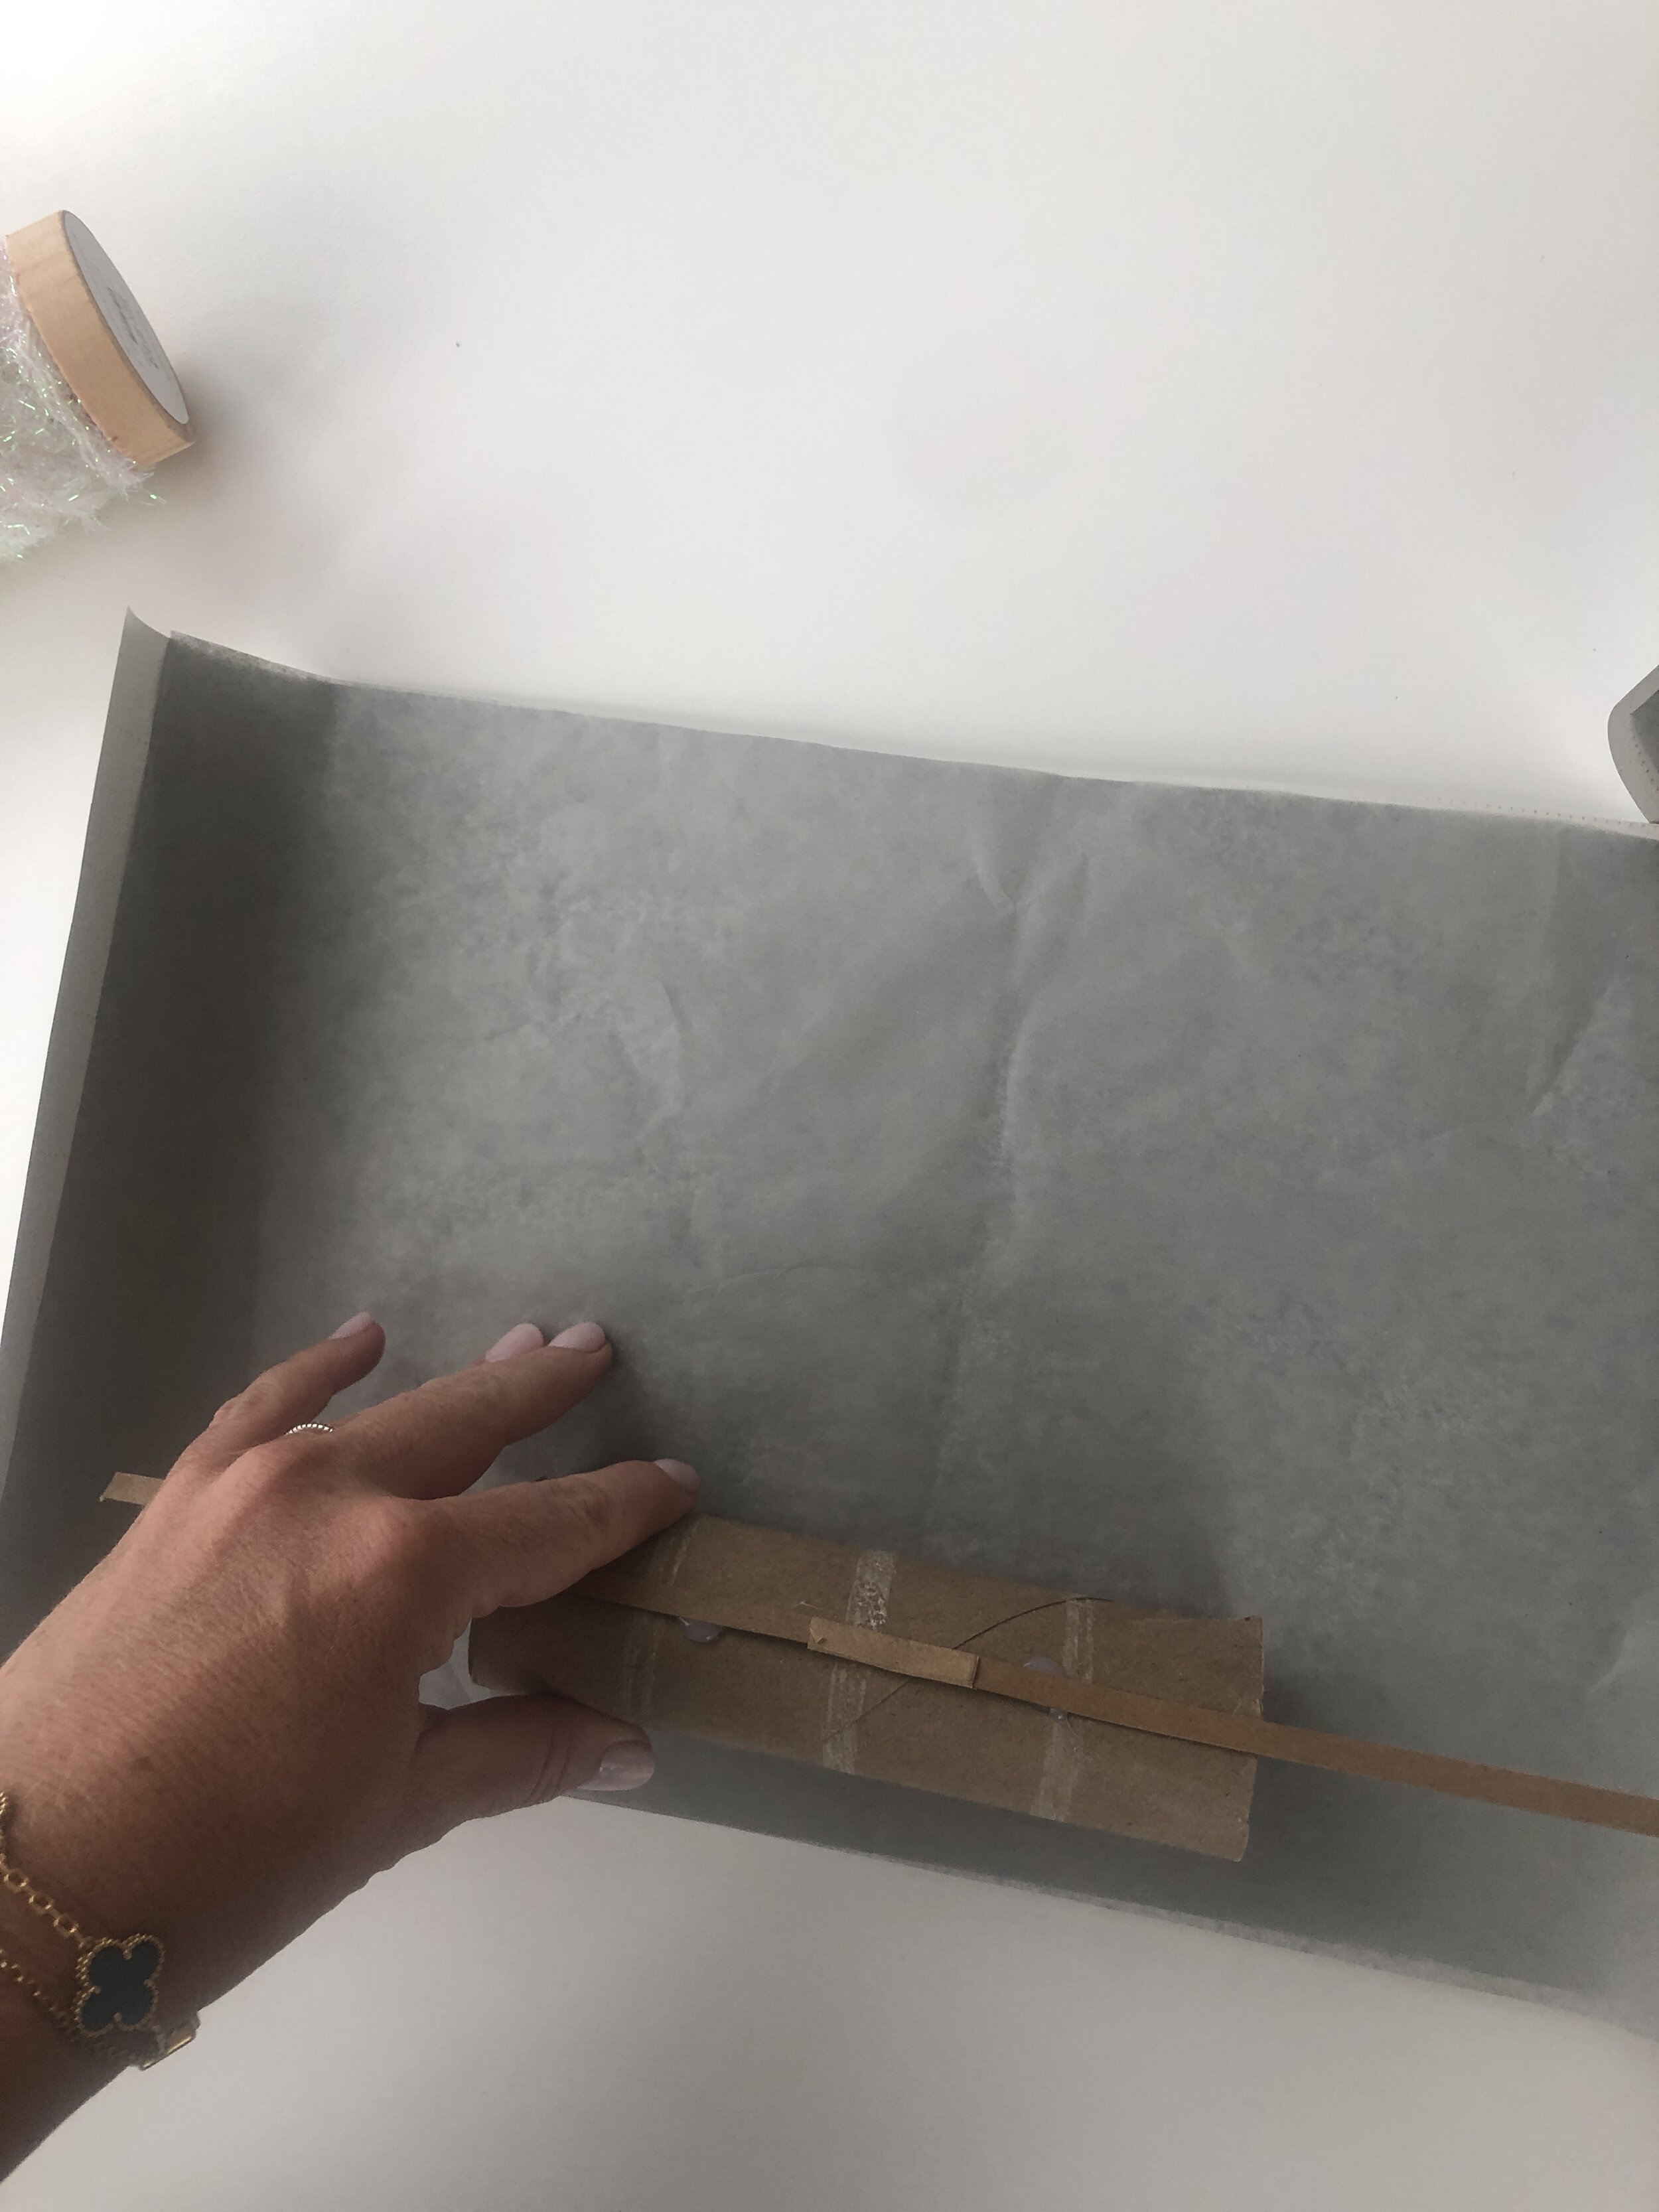
Step 2: Cut your papertowel roll in half and hot glue the cracker on the center. Follow the below image.

Step 3: Cut out a square of tissue paper and wrapping paper that fits the tube.
Step 4: Place the small gifts carefully inside the tube.

Step 5: Hot Glue gun the roll to the papers. You will need to glue both the layers. Roll around the tube.

Step 6: Wrap around the tube and hot clue to seal closed. Then tie the ends with the string!

Step 7: Trim ends if needed

Step 8: Then finish with a personalized name tag and enjoy!
**TIP- These make great name cards for guests during the holidays! Each person can get a special gift. Happy holidays to all!