Pull Off The Holidays with Sun-Maid

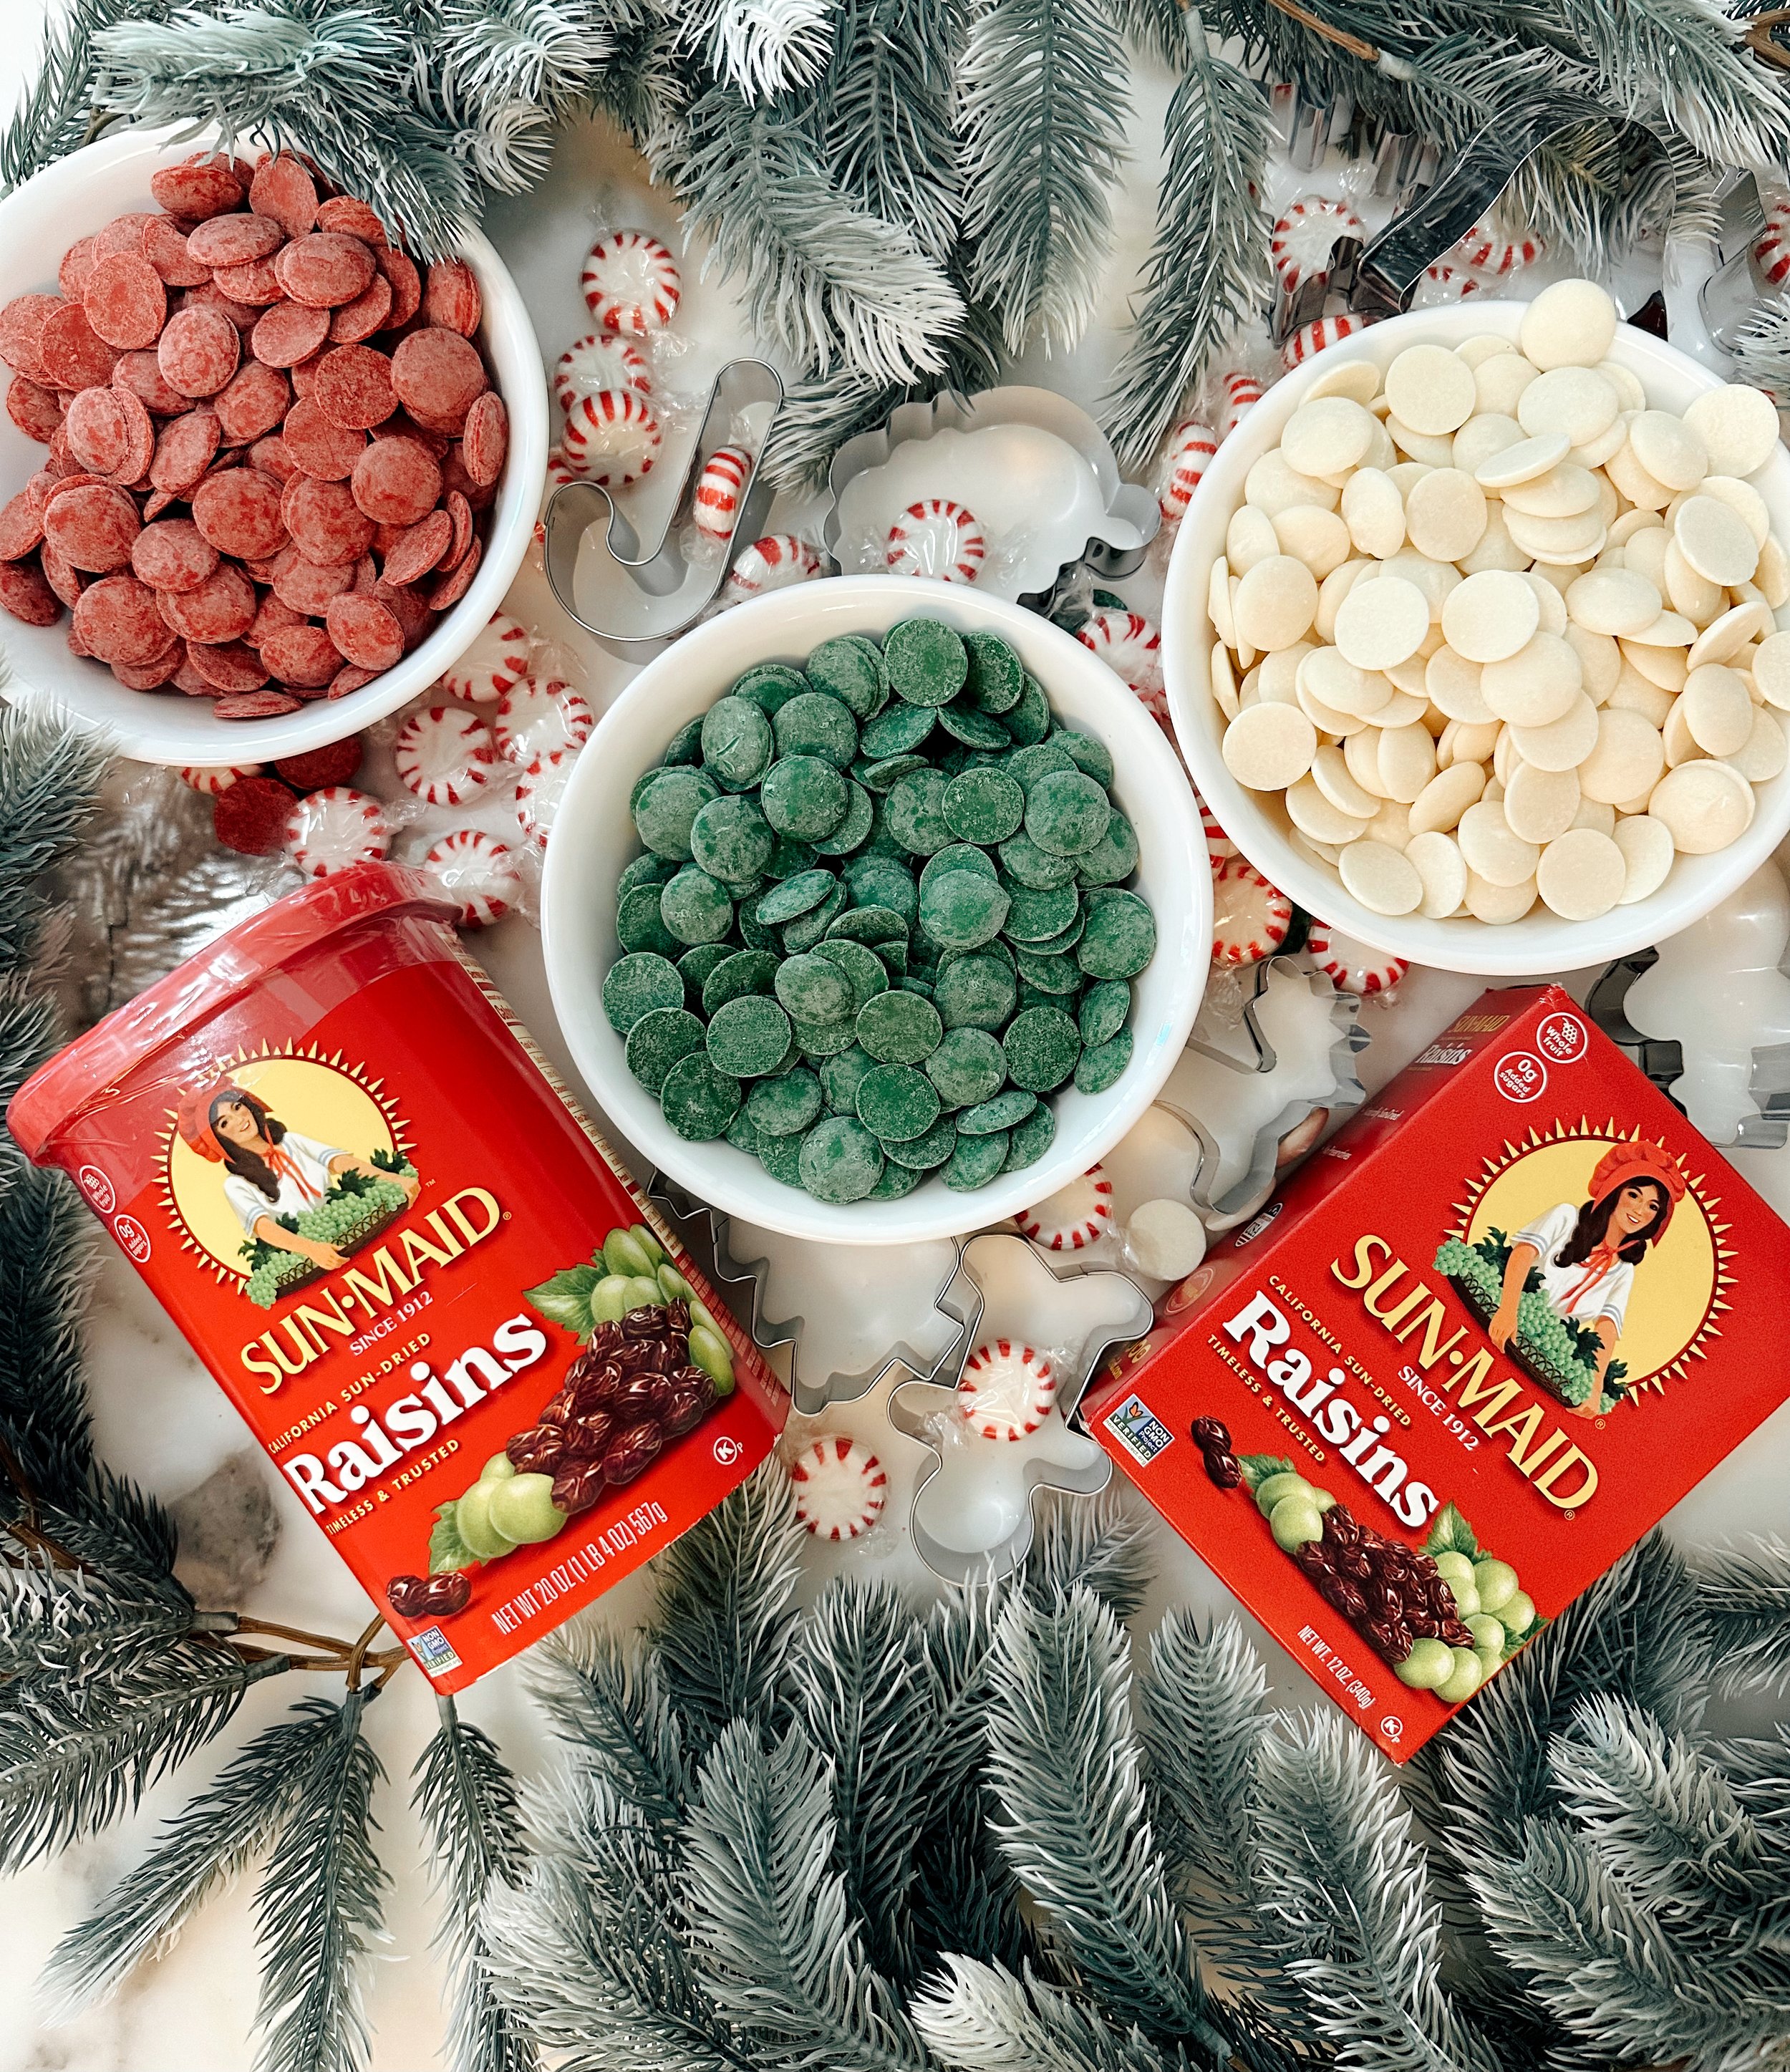
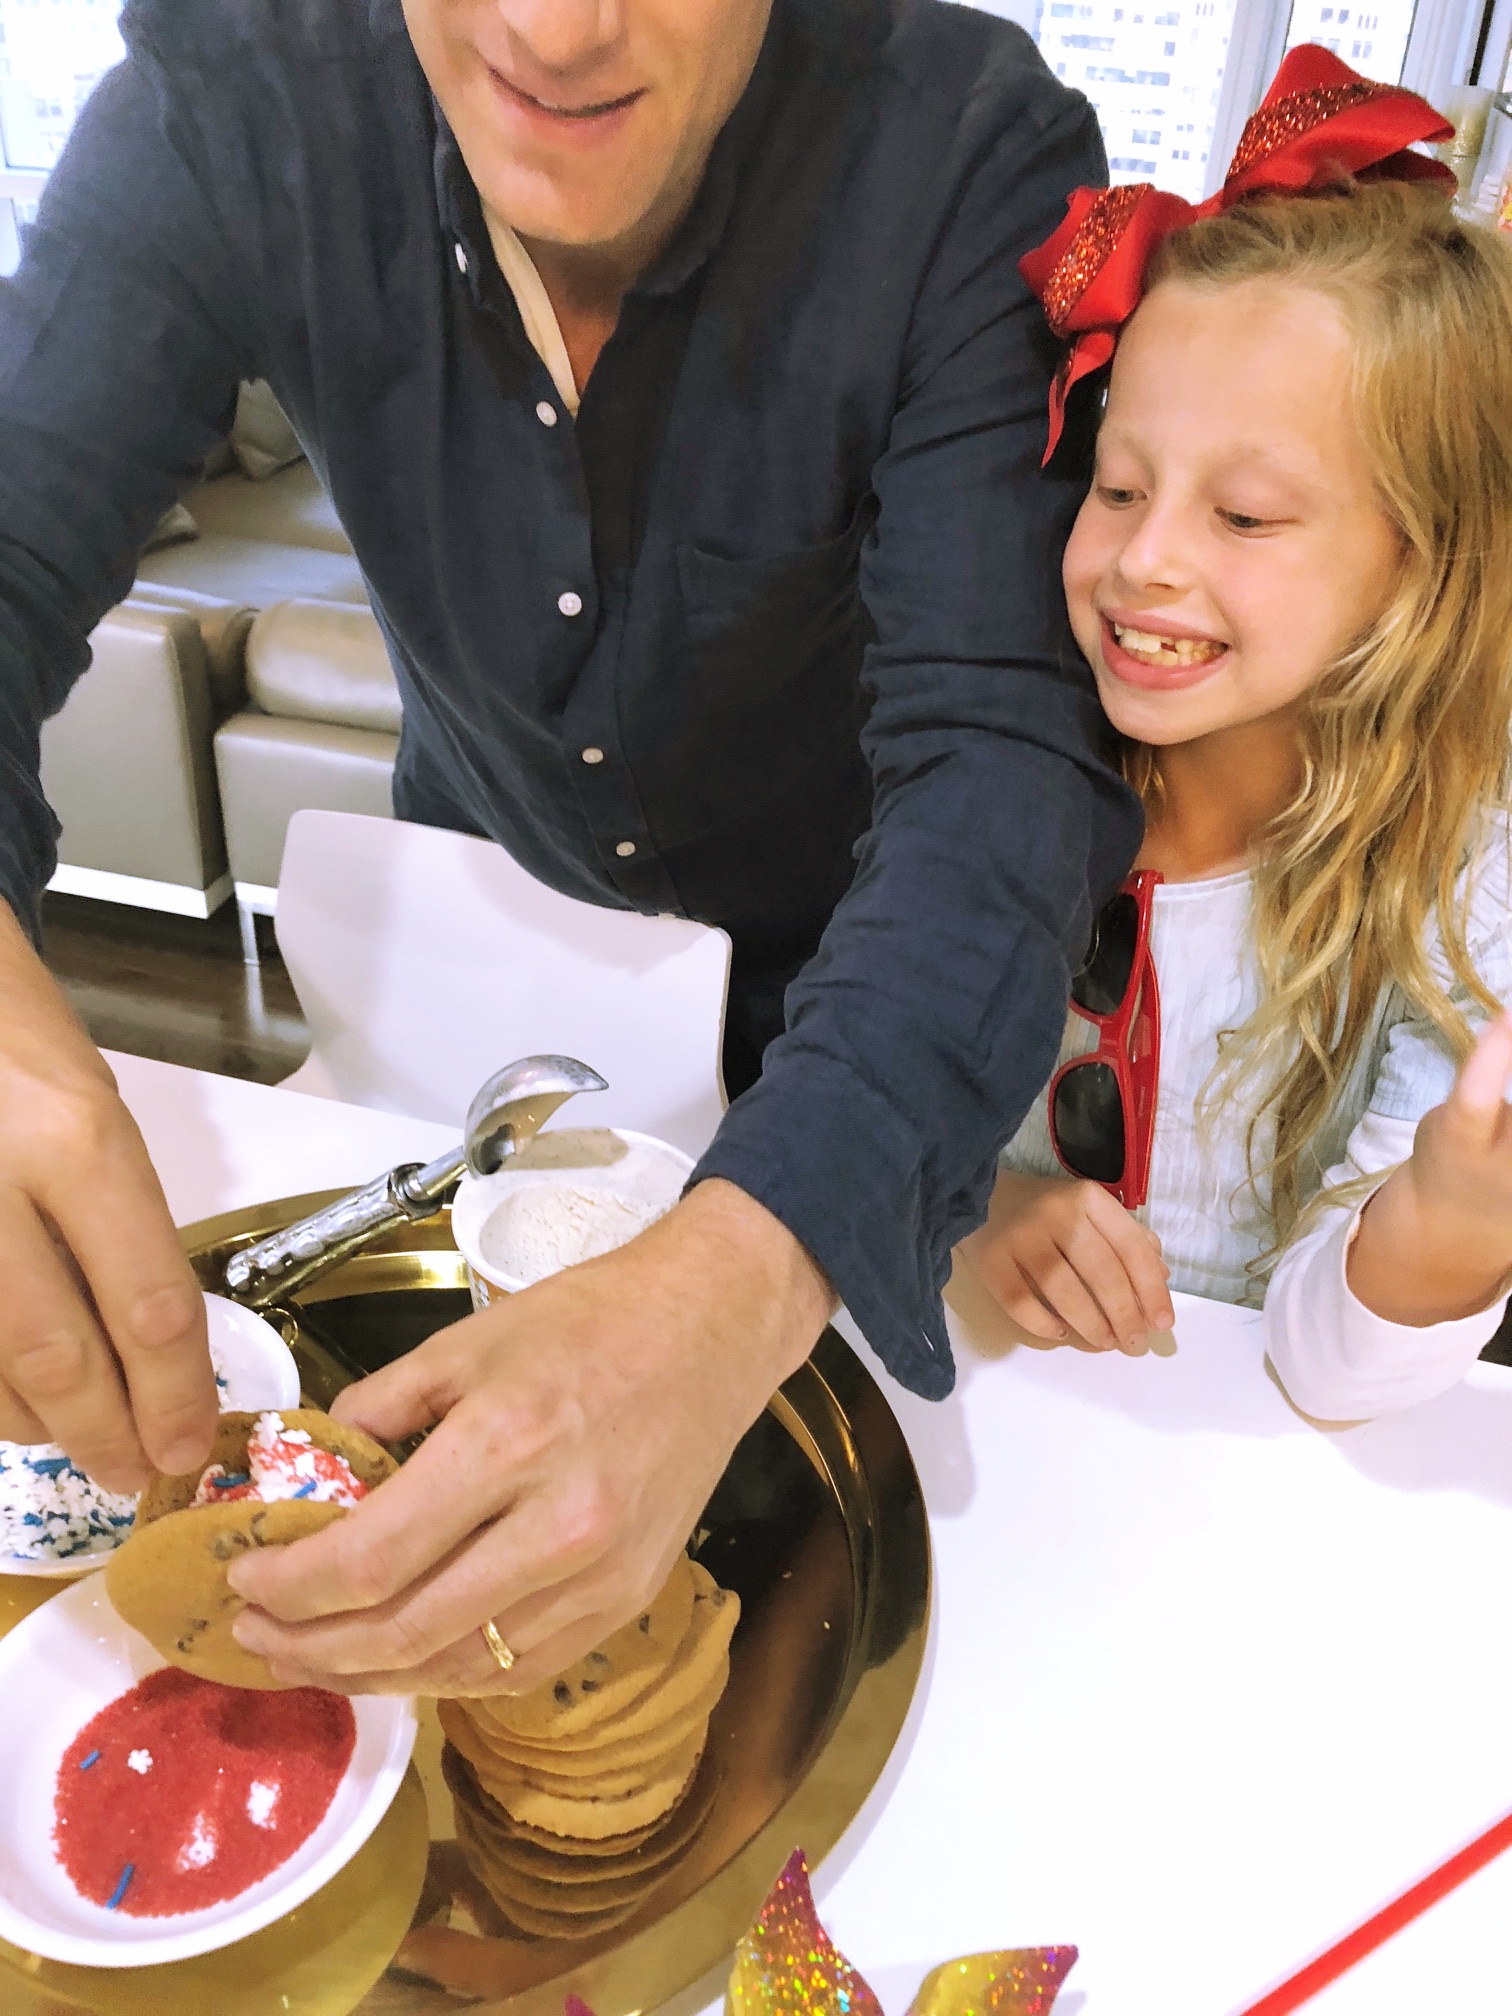
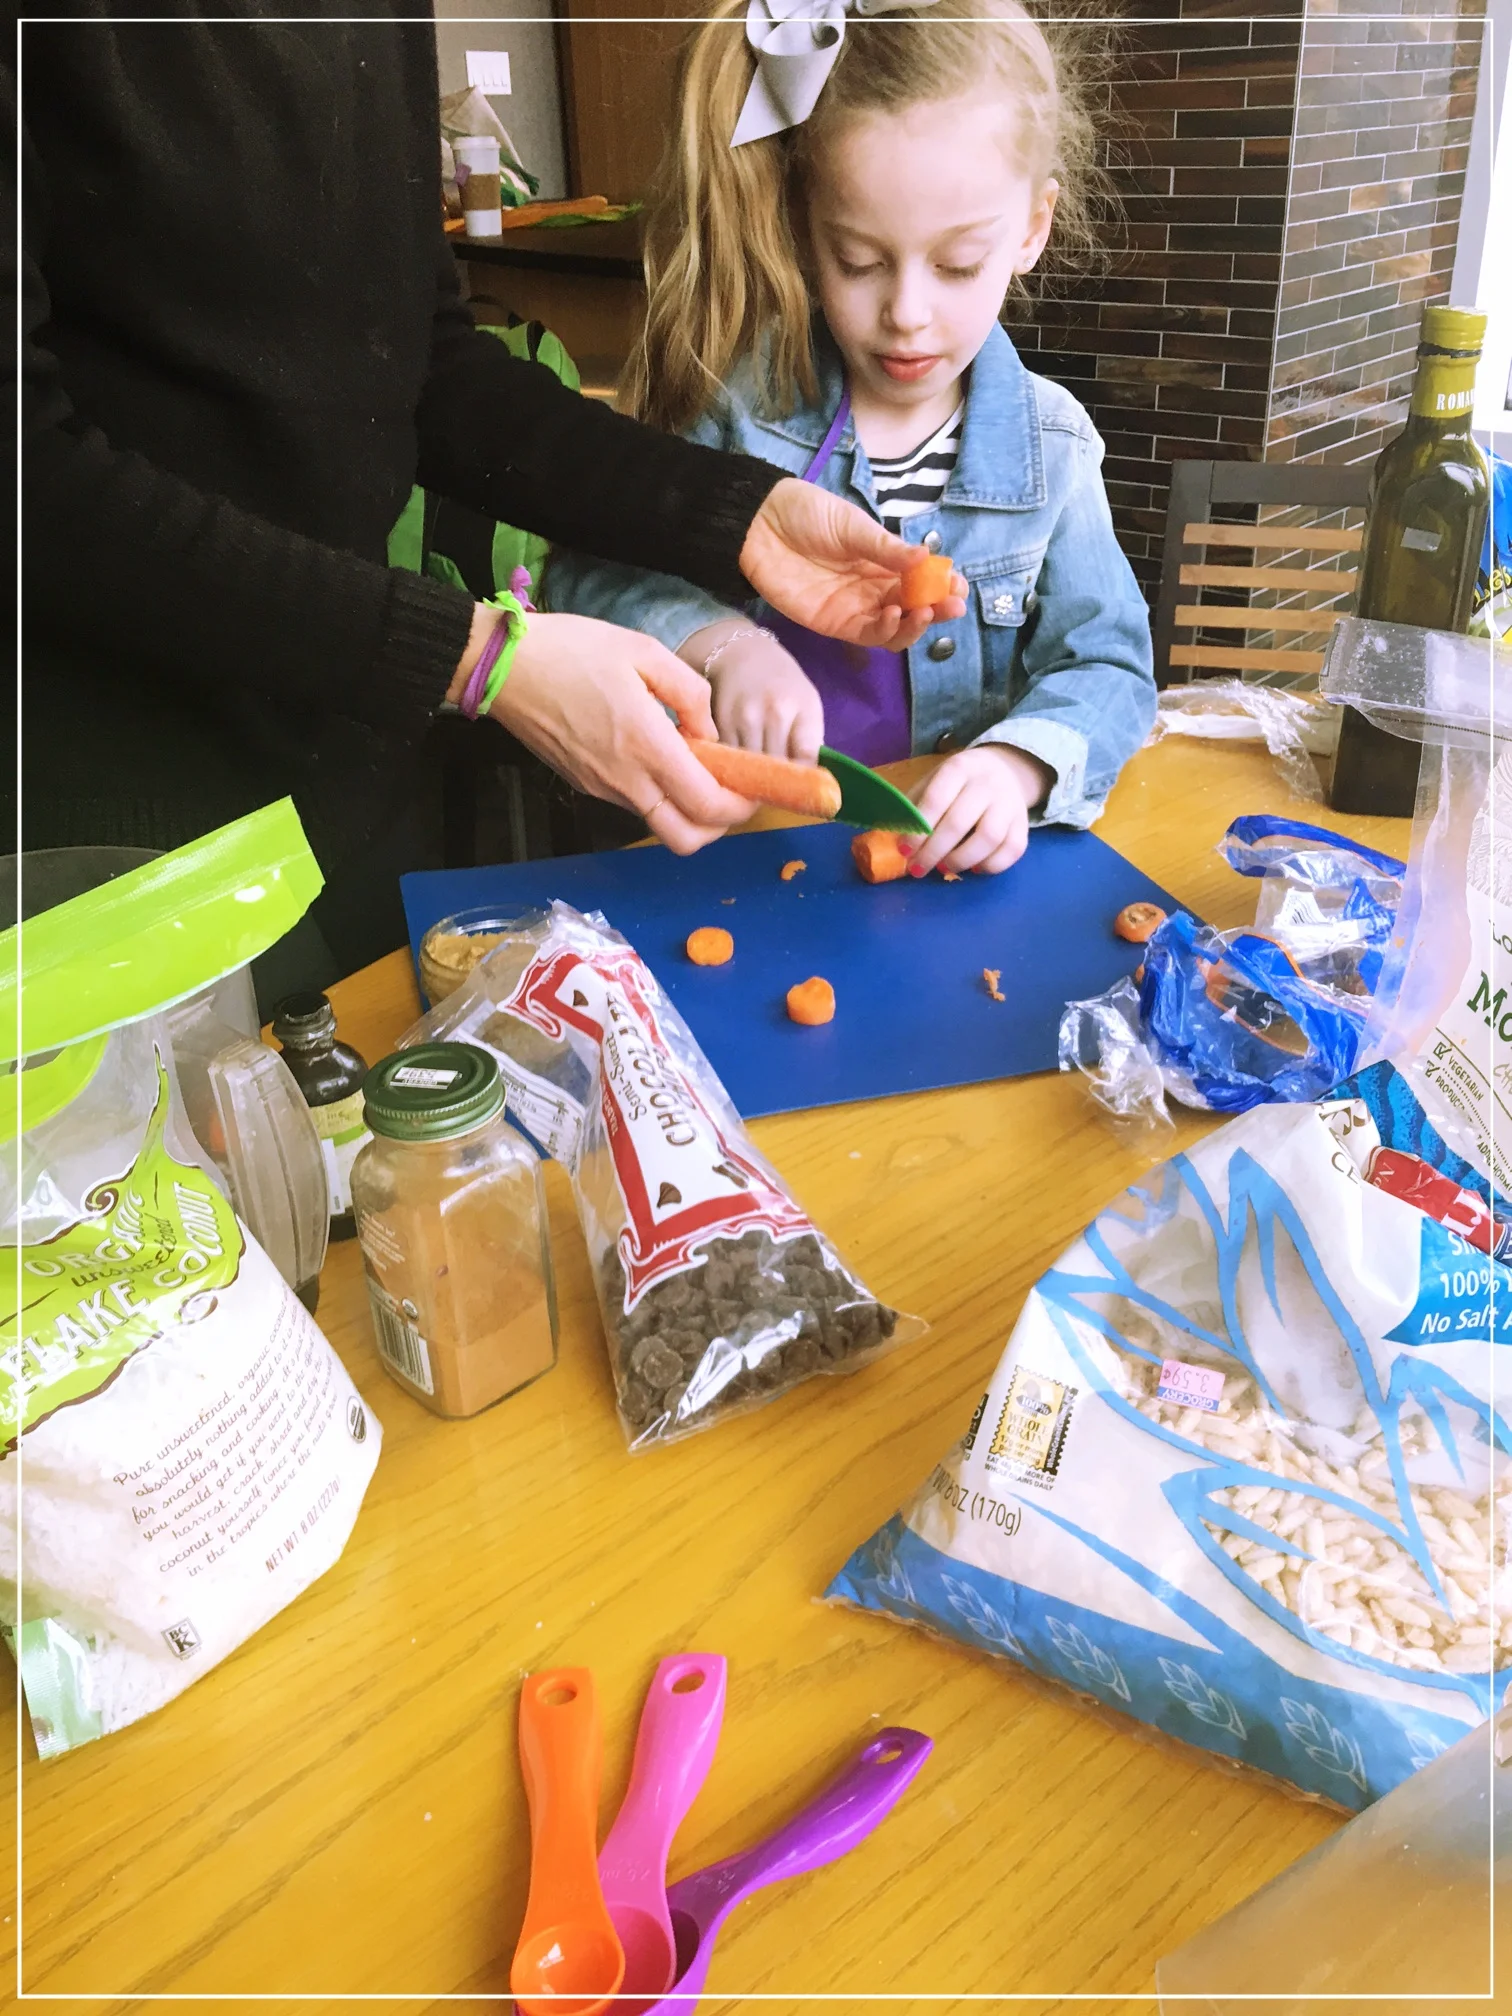
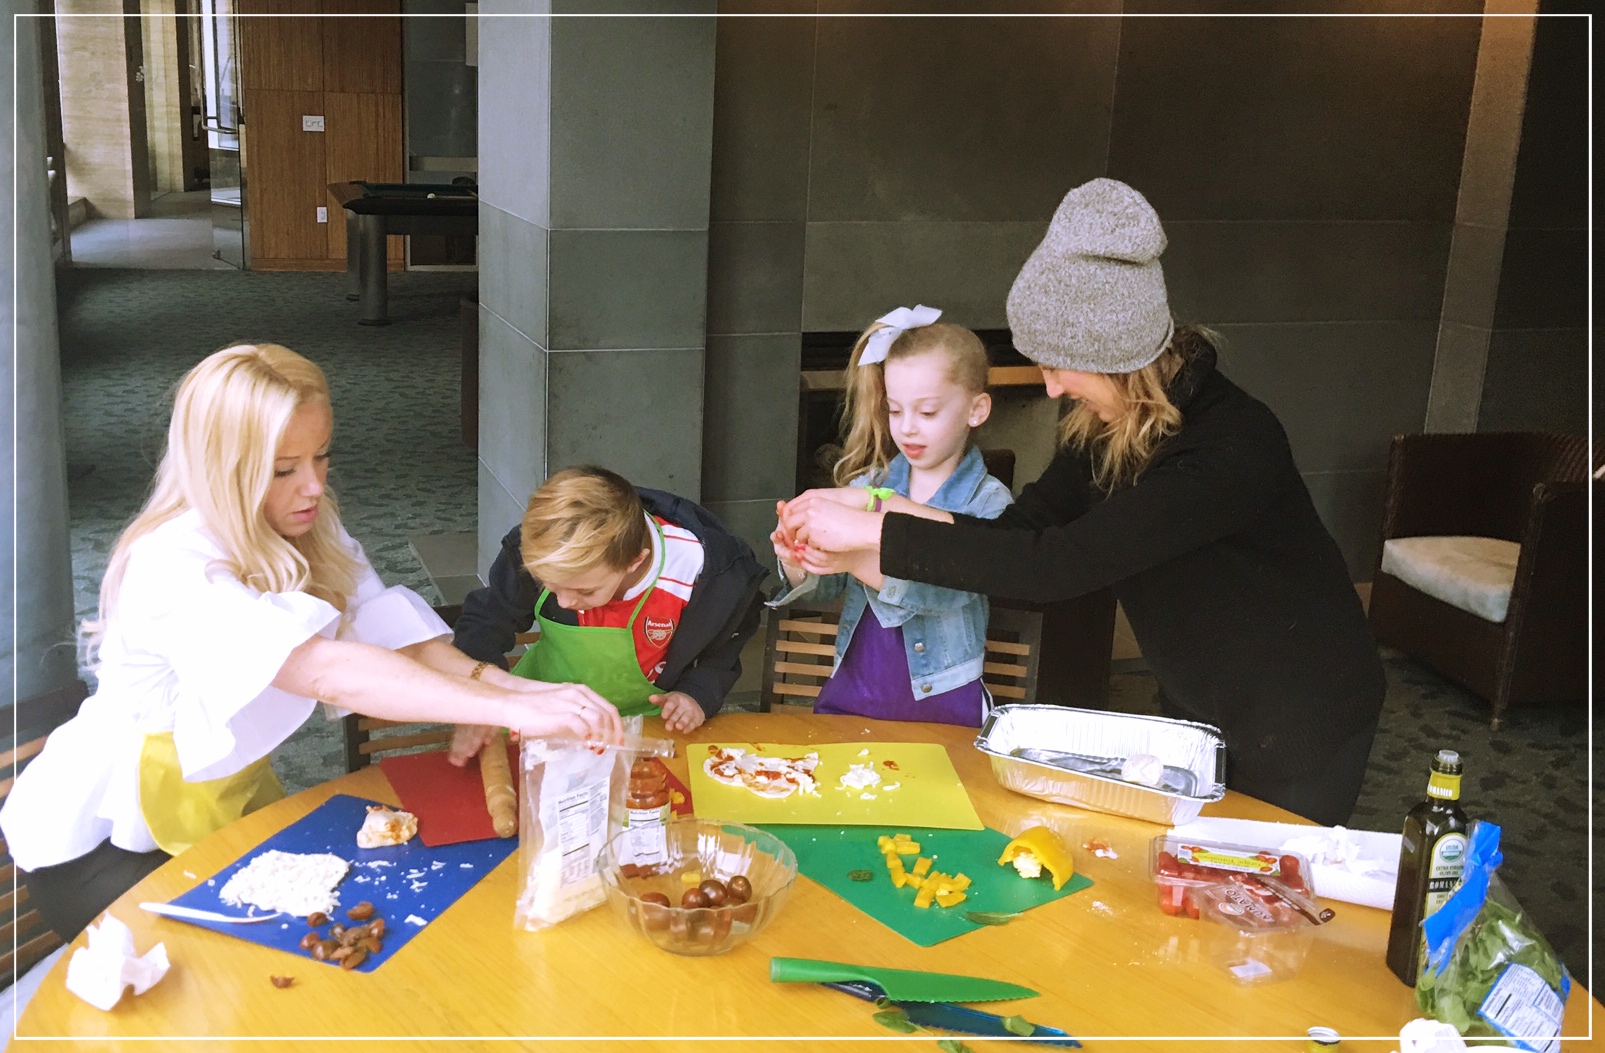
We love Sun-Maid and this year I wanted to make something super special for all of our friends, teachers, neighbors and family! So I came up with these beautiful, delicious and super easy peppermint bark bites with Sun-Maid!

Love chocolate covered raisins? Well you will absolutely go crazy over this festive new twist on a classic. White chocolate melts, with the chewy and sweet raisins plus the crunch of the peppermint is a perfect treat this holiday season!

What you’ll need:

3 bags of assorted colored chocolate melts

Peppermints (crushed)

Sun-Maid Raisins 

Festive Sprinkles 


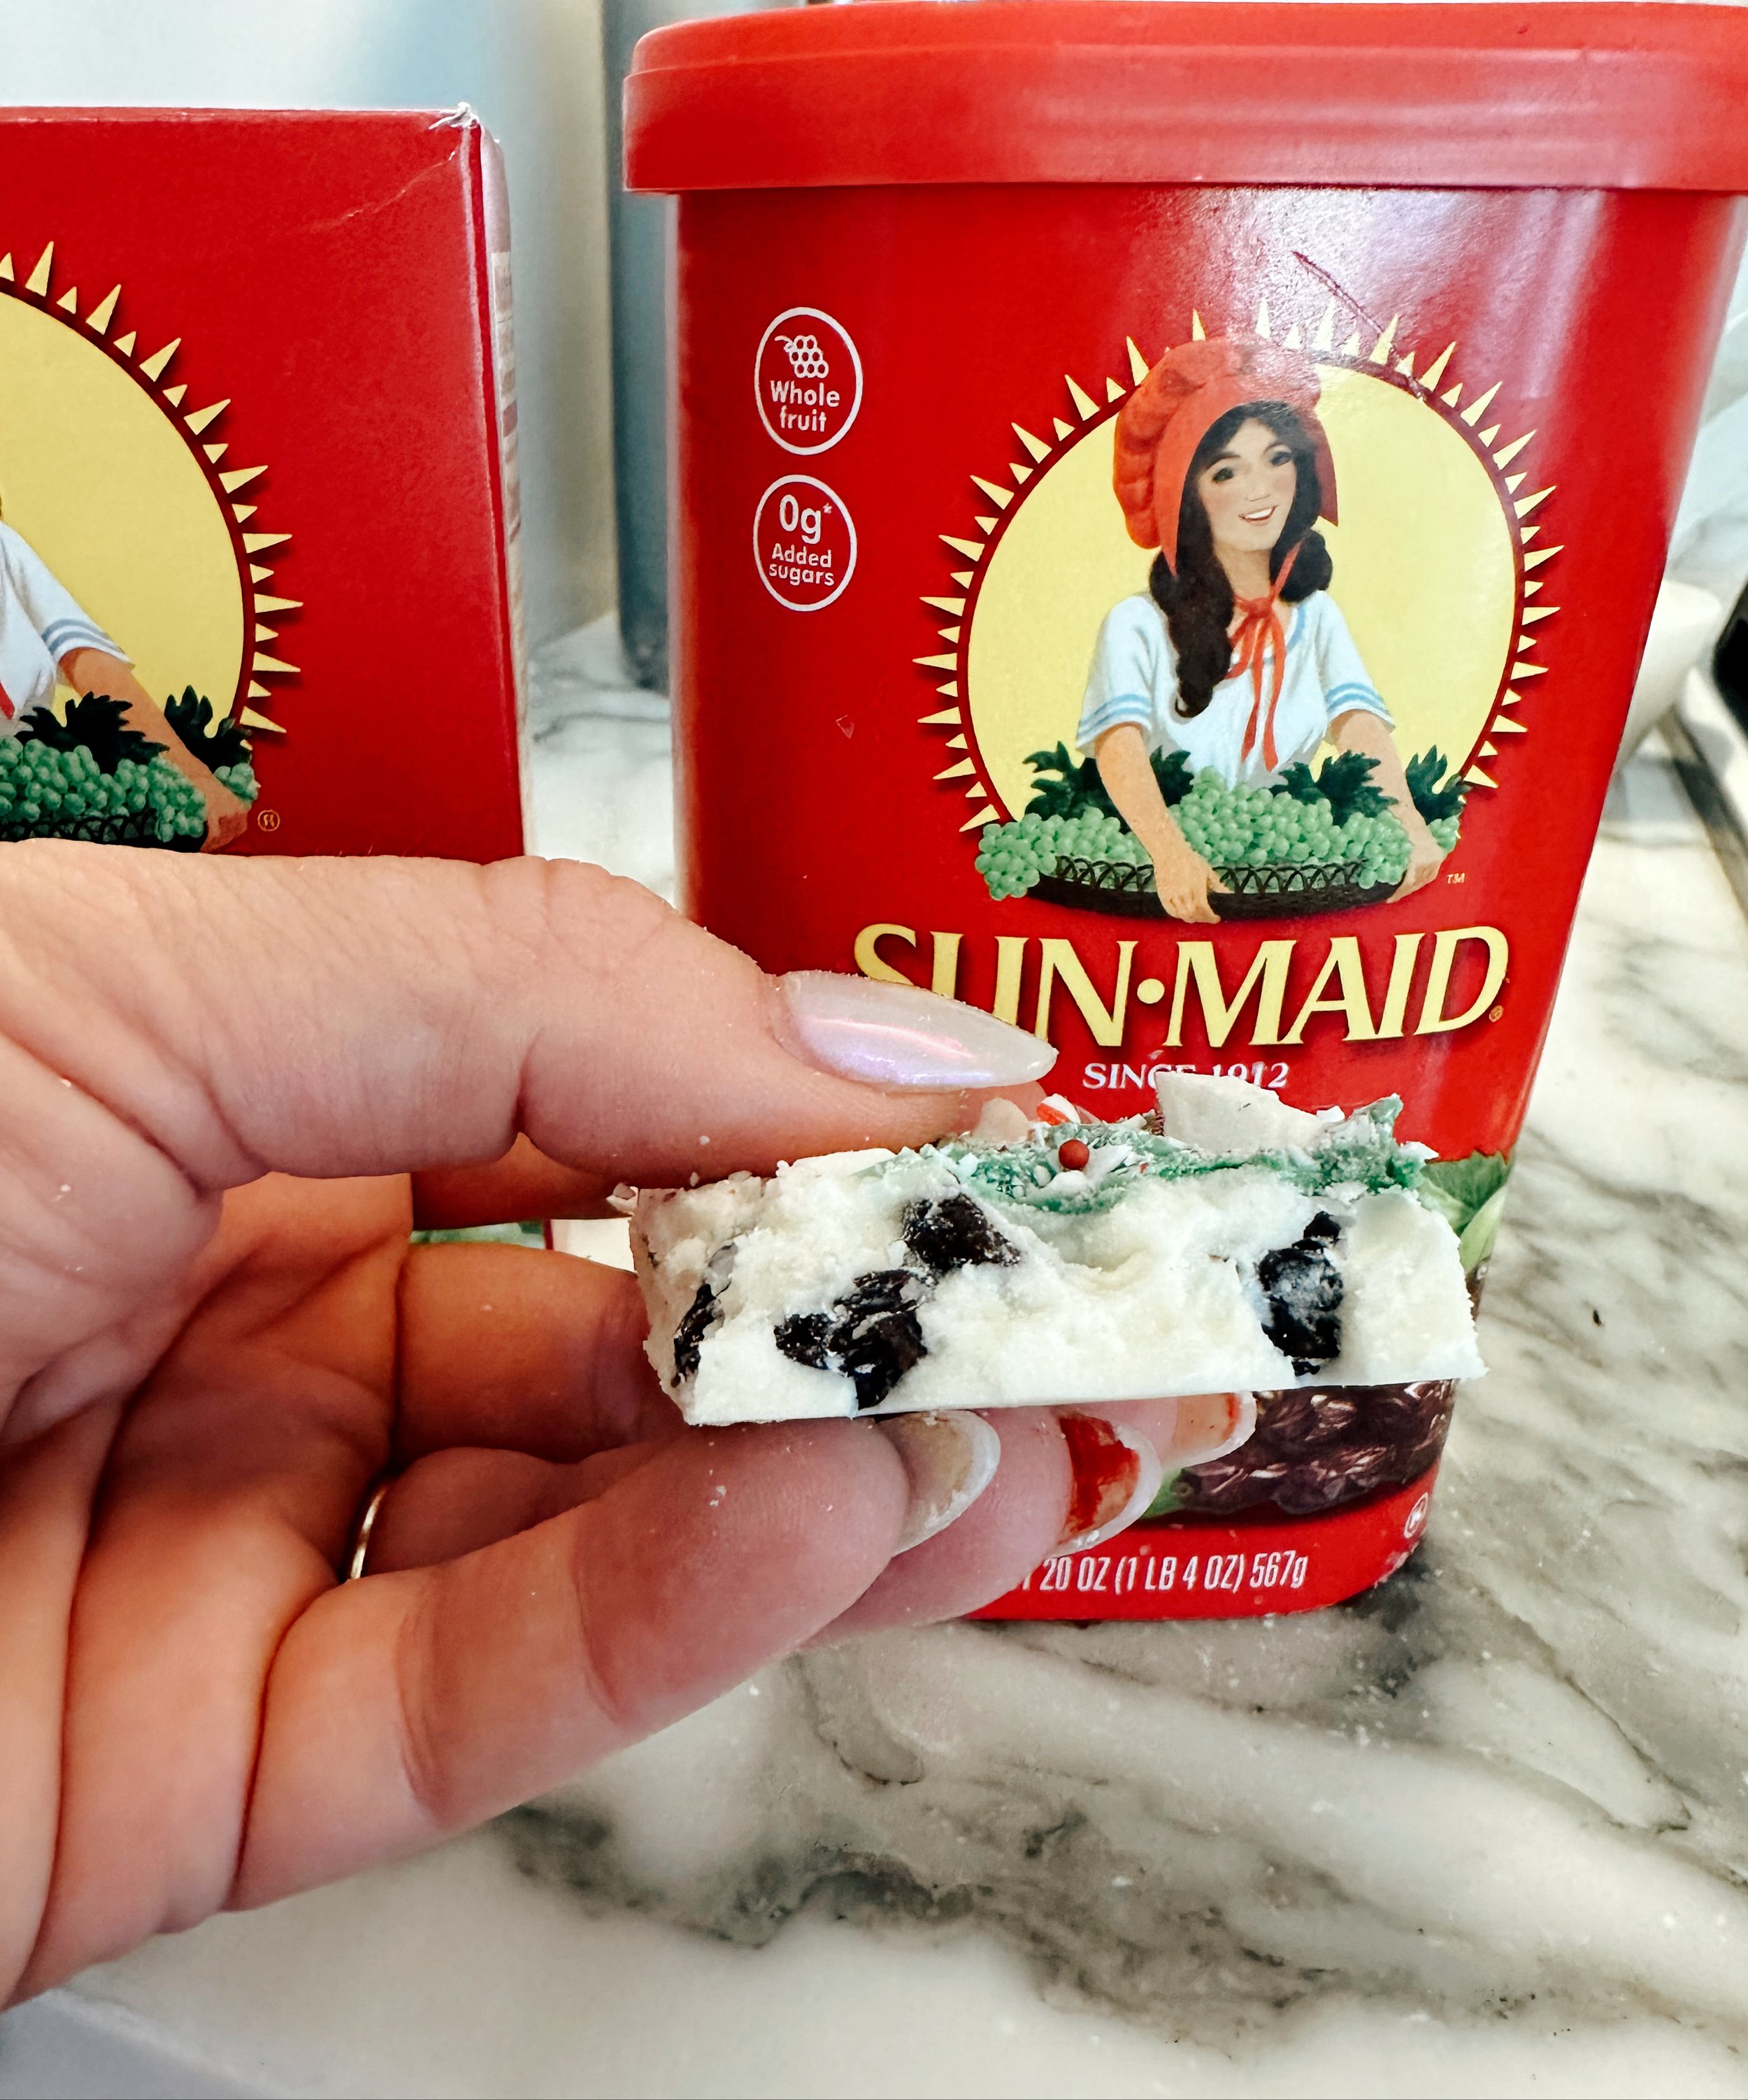
*Melt chocolate in microwave in separate bowls in 30 second increments until melted. Line 2 cookie sheets with parchment paper. While the chocolate is melting, crush a handful of peppermints in a plastic baggie. Once chocolate is fully melted, add raisins. Then pour onto cookie sheet. Take a butter knife or icing tool to make pretty swirl designs in the chocolate blending the colors. I did one with red and white, then a separate with green and white. While ththe chocolate is still warm, add the peppermint and sprinkles. Let cool and harden. Then break into smaller pieces. Enjoy! 

Take Your Moment, with Joy Bites

RSC_JoyBites_Content_Bars_Group_0477-1200x900-e339a72.jpg

I scream, you scream, we all scream for Me-Time!! You hear me, right Moms?!

The summer is winding down here, the kids are heading back to school soon (wahoo!) But, with having to get the kids new backpacks, clothes, the millions of school supplies on the list, not to mention the dreaded end of summer hair cuts, it’s leaving us parents with little time to ourselves, yet again!

A9E13F96-B9E6-41E2-8319-DA05CBD742AC.JPG

The end of the summer is supposed to be a relaxing time but for most of us, reality is, that it can be the most chaotic time of the year. Well, excluding the holiday season which, I hate even mention, is 17 weeks away; eak! Sometimes it’s all about just taking a moment (yes, even if its just spending a few extra minutes in the car after running errands) and really doing something for yourself.

5FB5F00C-AD7F-4AD5-92E6-EDCC301A2D10.JPG

Well, this product is for you! Joy-bites, by Russel Stover, has recently launched and they are more delicious that you could even imagine… with Sea Salt Caramel, Roasted Almond, Caramel, Chocolate and Peanut Butter. There is something for everyone. Especially for ALL of you chocolate-craving-late night-snacking moms (and dads too of course!) This one is for you!

RSC_JoyBites_Content_Bars_Group_0538-1200x900-e339a72.jpg

Say Hello to Joy Bites...and So Long to Added Sugar! Joy Bites say NO to: Added Sugars, Added Colors, Artificial Sweeteners, Artificial Preservatives, YES to joyful flavor! And Joy Bites uses Sustainable Practices like fairtrade cocoa and vanilla, 100% Recyclable Packaging, earth friendly packaging / eco-friendly packaging, FSC Certified Sleeve, Keto-friendly.

57097FCD-6FE4-4B74-9D15-29B9C8492454.JPG

A few more things I love about Joy Bites, this delicious chocolate is made with plant-based stevia extract, no artificial flavors or preservatives!

So do everyone a favor and just take your moment… Guilt not included; we all know you deserve it.

DIY Sweet Swaps with Sun-Maid

*This is a Sponsored Post, but all thoughts and comments are my own

image00002.jpeg

Sun-Maid Sour Raisin Snacks are a better for you Easter treat that taste like sour candy but are whole fruit with no added sugar available at Target! So I wanted to provide some fun Do-It-Yourself Easter themed ideas that the kids will absolutely love and I promise they won’t even miss all that extra sugar.

Did you know that on average, Americans consume 16 million jelly beans during Easter? And that on average, around 90 million chocolate bunnies are sold for Easter*… Now isn’t that a TON of sugar! Not to mention, that it costs typically 2.6 billion which is whats spent on candy during Easter in the US.*

To combat high sugary candy intake this Easter, I’ve partnered with Sun-Maid on a Reimagined Easter filled with better for you snacks! Plus, they are a fun playful surprise for the kids!

image00005.jpeg

Dancing Raisins-

Its time to throw out the term “don’t play with your food kids”… Because this DIY is ALL about playing with their food. Swap out that sugary juice for a naturally sweetened fizzy drink. So fill up a glass of bubbly water or soda water, then grab a pack of your favorite Sun-Maid Sour Raisin Snacks… Have the kids drop a few raisins in and see the magic!! The raisins actually DANCE! Not only will they also naturally flavor their drink, no added sugar, but they will be electronic free and entertained during Easter brunch with this fun DIY! This awesome trick is just yummy as it is exciting! Kids of all ages will enjoy!

image00006.jpeg

Bunny Trail-

We all love trail mix! So swap out the sugary candy for some Sun-Maid Sour Raisin Snacks! Grab a small recyclable bag and a pack of your favorite Sun-Maid Sours. They mix perfectly with granola, seeds, nuts… do an assortment of little snacks to your liking!! Then, get active this Easter with a fun “Bunny Trail” walk and bring along your own bags of Trail Mix with Sun-Maid Raisins, to refuel throughout your adventure!


Easter Egg Hunt-

Sun-Maid Sour Raisin Snacks fit perfectly inside the little plastic eggs! Swap the sugary snacks for this better for you option. The kids will love discovering which flavor they find. Plus at the end, they can count up and see how many raisins they found!

image00003.jpeg

Sun-Maid Sour Raisin Snacks are fruit snacks the way nature intended – they taste like sour candy but are whole fruit. Taking the raisin up a level using sweet golden raisins, and simply adding a little sour pucker of natural fruit flavoring– that’s it! No added sugar, and nothing artificial. It’s an entirely new flavor experience … like candy that’s sour yet sweet. Perfect addition to any Easter basket!

Sun-Maid’s Sour Raisin snacks are available at Target – including Blue Raspberry, Mixed Berry, Watermelon and Strawberry.

image00007.jpeg

-*Good Housekeeping article (posted 2.11.21)

DIY Super Bowl Candy Charcuterie Board

image00004.jpeg

Look how fun this DIY Super Bowl Candy Charcuterie Board turned out!

Every year for the super bowl, my building throws a huge party in the lounge (common area) and all our friends and neighbors gather to watch the big game! This year I wanted to bring something sweet and special for the kids. That’s how I came up with this fun and simple game day dessert tray!

I know the kids are adults alike will love it!

image00005.jpeg

Here is how I made it:

  • Start by using a football or themed tray! (Not completely necessary but fun to see peeking through under the candy as it starts to get eaten!)

  • Get tons of bulk candy in greens, whites and browns.

  • Then get creative and have fun creating a unique football design! Each one will be different depending on the candy you select. There is no right or wrong! So have fun with this!

IMG_1563.jpg

First you’ll want to get the major parts of the tray filled! My goal (pun intended!!) was to make it look like an actual field and football in the middle. I loved the tray that I had from last Super Bowl so I used that one and mirrored the candy to look the same as the tray! A big football in the center and the field around it.

image00009.jpeg

I used chocolate footballs for the center! Chocolate is hard to handle as it melts while you are working with it so I loved these little prewrapped ones I found on Amazon. Any chocolate candies will work so use what you know everyone will like!

image00003.jpeg

Then I used a mix of gummy bears, sour gummy rings, sour green strings, green dum sums and white gumballs to finish off the field lines. I love how it turned out! Can’t wait to share it with everyone on Super Bowl Sunday!!

image00007.jpeg

Kids in the Kitchen with Campbell's & Geoffrey Zakarian

IMG_4275 2.JPG
IMG_4271 2.jpg

I grew up eating Campbell’s soup. Not only is it my maiden name, which lends itself to having ton’s of Campbell’s Soup memorabilia, but it is a brand that my mom always relied on.

Especially around the holidays because of my mom’s famous string bean casserole. You know the one with the Cream of Onion condensed Campbell’s soup? Well, you either know or you don’t… but everyone should know it! Click here for a delicious recipe! Perfect for Thanksgiving… Christmas… such a special dish you will crave each holiday.

IMG_4274 2.JPG

Recently Brycen, Brinkley & Brent got their aprons on (Campbell’s aprons I might add!) and heading into the kitchen to cook with Geoffrey Zakarian His family cooks together all the time and I loved seeing what recipes they taught them how to make! All three of my kids enjoy being in the kitchen. Each child gets a job and I know which ones they are good at! But they are constantly asking to make something. Even Brent will head to the kitchen alone, gather ingredients and ask to cook!

IMG_4273 2.jpg
Screenshot 2019-12-16 16.20.54.png

So of course the kids had a blast getting to mix and stir with the Zakarian Family and Campbell’s. And I loved watching them use some of my favorite Campbell's soup recipes reinvented and used in totally new ways! Like this chicken pot pie! And boy, it was scrumptious. Brent had three, yep, three helpings of this… and I have to admit I may have had seconds myself.

Cooking with a full house or should I say kitchen, like I always have, doesn’t have to be stressful! These recipes make cooking fun and easy! But the best part is doing it together…

IMG_4269 2.jpg

Easter Basket Bread Cake

Easter Basket Bread Cake 25.jpg

WOW your family and guests this Easter with this delicious Easter Basket Bread Cake. The sweet bread combined with surprise chocolate egg bites is just so much fun! This is the perfect addition to any Easter brunch table.

Here is what you’ll need:

  1. Large bowl or Basket to serve and display

  2. Edible Easter Grass for garnish

  3. Mixer/Bowl/Saucepan

  4. Kinder chocolate eggs

  5. *Dough Ingredients

INGREDIENTS

  • 3 1/2 cups all purpose flour

  • 1 package (2 1/4 teaspoons) Quick Rise yeast

  • 1 cup milk

  • 1/4 cup sugar

  • 1 teaspoon salt

  • 2 eggs

  • 6 tablespoons unsalted butter, softened, cut into 12 pieces


    INSTRUCTIONS

Easter Basket Bread Cake.jpg
  1. Mix 2 1/2 cups flour and yeast in mixing bowl, using the paddle attachment, on low for about 30 seconds. 

  2. Heat milk, sugar, and salt in a small saucepan over medium heat until sugar is dissolved and milk is between 120º to 130º. 

  3. With mixer on low, pour in liquids and mix until incorporated. Add eggs one at a time. Continue mixing until a shaggy dough forms. 

  4. Clean off paddle and switch to dough hook. Mix in the remaining 1 cup flour a little at a time, adding more or less flour as needed to make a soft dough. 

  5. Add the softened butter, a piece at a time, kneading until each piece of butter is absorbed. Knead for eight minutes on low. The dough should completely clear the sides of the bowl. If it is too sticky, add additional flour 1 tablespoon at a time, mixing in thoroughly before determining if more flour is needed. If the dough seems too dry, spritz with water from a spray bottle a couple of times, mixing in thoroughly before determining if more water is needed. Every 2 minutes, stop the machine, scrape the dough off the hook, and then continue kneading. 

  6. Turn the dough out onto a lightly floured surface and knead a few times by hand to be sure it’s smooth and elastic. Form the dough into a ball. Place dough into a greased bowl. Turn once so greased surface is on top. Cover bowl with plastic wrap and refrigerate for 1 hour. 

Easter Basket Bread Cake 2.jpg

Then, cut dough into 3 even pieces. Roll out the pieces until they are about two feet long. Then braid them together. Twirl the braid into a circle and place on a greased baking sheet. Hide the Cadbury chocolate eggs within the dough. It is so much fun pulling pieces of the bread and getting a bite with the chocolate! Then cover and let sit for another hour at room temp. before baking. Preheat oven to 350 degrees.

Easter Basket Bread Cake 3.jpg
Easter Basket Bread Cake 5.jpg
Easter Basket Bread Cake 6.jpg
Easter Basket Bread Cake 7.jpg
Easter Basket Bread Cake 8.jpg
Easter Basket Bread Cake 9.jpg
Easter Basket Bread Cake 10.jpg
Easter Basket Bread Cake 11.jpg
Easter Basket Bread Cake 15.jpg
Easter Basket Bread Cake 12.jpg

While the dough is rising, preheat the oven to 350º. Bake the cake until it is golden brown, 20–35 minutes. Remove from oven and let cool 10 minutes on baking sheet and then place it on a cooling rack to cool completely.

Easter Basket Bread Cake 18.jpg
Easter Basket Bread Cake 19.jpg
Easter Basket Bread Cake 21.jpg
Easter Basket Bread Cake 23.jpg

Once the bread has cooled finish placing the rest of your chocolate eggs on the top of your basket.

Take your large bowl or basket and line it with the edible sugar grass.

Carefully place the bread in the center and its ready to serve!

*Dough only recipe from https://www.barbarabakes.com/mardi-gras-king-cake/

Giant Gummy Heart

10803132720_IMG_0206.JPG

It’s no secret that Brinkley and I have a bit of a sweet tooth so making this was just so much fun! We both love being creative in the kitchen and getting this time together was so special. Plus, I love getting into the Valentine’s Day vibes. It makes celebrating the holiday much more memorable when you do something unique with the ones you love.

10803129552_IMG_0252.JPG

We gathered all of our favorite red gummy candies and were on a mission to make the largest, sweetest and gummiest Valentine’s Day Heart Shaped gummy ever! And I think we succeeded! So get ready to tempt your tastebuds with this delicious treat. And taste testing each candy is a must! Just ask Brinkley.

10803073488_IMG_0255.JPG

Thanks to our friends at Jet Black for helping us find all these supplies. We needed the perfect red colored candies and the large silicon mold so with one simple text to Jet Black, I received all the goodies in just a few days. Such a time saver for this busy mom! Need it, Text it, Get it!

IMG_6120.JPG

This was fun to make together and see how it all melted together was like a science experiment. Plus, how fun is this to serve at your next Valentine’s Day party. ***Serve by cutting into small 1/2 cubes using a pizza cutter. If serving on a tray, coat the bottom of the tray with a thin layer of granulated sugar to avoid sticking to the bottom.

10802616656_IMG_0245.JPG

Here are the candies we used to make this:

  1. Red Coins

  2. Juju Red Coins

  3. Wild Cherry Gummy Rings

  4. Cherry Jelly Fruit Slices

  5. Gummy Bears

Layer as you' like into the Heart Shaped Silicone Baking Pan. Here is the link to a similar one..

10803107312_IMG_0250.JPG

Then bake at 375 degrees for approximately 30 minutes until most of the candies have melted together. A few of ours didn’t melt completely but once the mixture started to bubble its time to pull it out.

10761611680_IMG_0290.JPG

Let cool for a few hours or over night. Release gently from the mold and enjoy!

***Make sure the pieces are smaller than a grape to avoid any choking hazards with smaller kids.

Milk Chocolate Heart Pizza

10795997280_IMG_0083.JPG

I just love baking with Brent during those long cold winter afternoons at home. We probably bake 4 out of the 5 week days and today we are baking up one of my favorite treats, a chocolate pizza!! With Valentine’s Day right around the corner this was the perfect baking DIY!

10795238288_IMG_0036.JPG

Since not all my kids are Nutella fans (I know, who does’t love Nutella?) we decided to make this with Brent’s favorite, milk chocolate. And I have all the tricks to making this perfectly. Yep, we’ve tried and failed but this one made the final cut!

Here is what you’ll need:

  1. Pre-made Pizza Dough

  2. Milk Chocolate Chips (about 1 cup)

  3. White Chocolate (about 1/2 cup)

  4. Baking Sheet or Pizza Stone

  5. Flour for coating work surface

  6. Decorations (*Optional)

10795985168_IMG_0029.JPG

Pre-made pizza dough is sold at many stores. I love the one from Whole Foods and I also love the pre-made dough from Eatly but if you don’t have this handy and can’t find pre-made dough I’ve included a recipe for that too. Click here.

10795985840_IMG_0033.JPG

Once your dough is ready, pre-heat the oven to 500 degrees. Dust the counter with a bit of flour. Then kneed out the dough first by stretching it and loosening it up. Now its ready to take shape! Let the kids have a blast creating the heart shape. It doesn’t have to be perfect! This process is so fun and your kids will love working with the dough. Kids of all ages will love this, plus if you are doing with this more than one child they all create their own shapes and makes for more fun! But Brent and I did this while the older kids were at school still so we had fun making this just for ourselves. Well, we may have saved a bit for them!

10795983056_IMG_0034.JPG

Once your shape is ready pre-grease a sheet pan or if you have it use a pizza stone coated with a bit of flour. Then pop it in the oven for 10-15 minutes on the lower rack.

10795999392_IMG_0059.JPG

While the dough is baking, warm your chocolate. We used milk chocolate chips and white chocolate for decorating. I placed about of cup of the chips into two separate bowls and placed them in the microwave for about 1 min. Stir and then put in for another 30 seconds if needed.

10795983776_IMG_0021.JPG
10795981760_IMG_0043.JPG
10795404624_IMG_0058.JPG

Once your dough is ready, let cool for 5-10 minutes before spooning on the melted chocolate. This will allow for the chocolate to not get too runny and drip off the sides. Use the back of the spoon to add a thick coat of the melted milk chocolate. Then drizzle on the white chocolate as shown below.

10795323328_IMG_0061.JPG
10795242848_IMG_0073.JPG

For an extra sweet Valentines Day feel, we added a few pink and red M&M’s. You can use pink or red heart shaped sprinkles too if you have them! How delicious does this look! It was so good.

10795994208_IMG_0077.JPG
10796000496_IMG_0088.JPG

Easy Christmas Morning Pancakes

save-new_2.JPG

Christmas morning is the best day of the whole year! Celebrate it with the kids with this fun and easy Holiday Pancake Recipe. No skills necessary to create this fun breakfast! And it’s guaranteed to bring smiles to everyones faces.

So grab the kids and head to the kitchen for this festive holiday treat!

IMG_1892.JPG

What you’ll need PER BATCH:

christmas pancakes.jpg
  • 1 1/2 cups - all-purpose flour

  • 2 tablespoons- sugar

  • 1 tablespoon- baking powder

  • 3/4 teaspoon- kosher salt or 1/2 teaspoon of fine sea or table salt

  • 1 1/4 cups- milk

  • 1 - large egg

  • 4 tablespoons- unsalted butter softened

  • 1 teaspoon- vanilla extract *Extra needed to coat the pan

  • 1 tablespoon- cocoa powder (for RED pancakes only!)

  • Pinch- cinnamon (optional)

  • Red & Green Food Dye

    TOPPINGS:

  • Warm Maple Syrup

  • Sprinkle of Confectioners Sugar

First, start by mixing all the dry ingredients in a bowl. Separately, mix all the wet ingredients. Add red dye to the wet ingredients of the first batch . This batch gets the cocoa powder! Think, red velvet flavor! Yum! Make sure the butter is not lumpy and then combine the wet into the dry ingredients with a whisk. This will help make the pancakes fluffy. Then repeat the same process for the green just don’t add the cocoa powder. Each batch will make about 8 pancakes.

Coat the pan or skillet with butter. Pour on batter with a ladle. This helps keep the servings accurate. Once the edges start to turn brown and the inside has small bubbles, you can flip! Cook on other side for another minute or two.

Stack the pancakes alternating colors. Then top with a sprinkle of confectioners sugar and coat with warm maple syrup! Enjoy. You can also use whipped cream in-between layers for a lovely holiday breakfast!

save-new_1.JPG
save-new_5.JPG
save-new.JPG

Healthy Cooking with Taters & Tots

IMG_0905_1.jpg

Who doesn’t want their kids to eat healthy? That’s why I was so excited Tasmine, Chef and Creator, of Taters and Tots came over and taught me (and the kids!) a fun, quick and easy Fall inspired healthy recipe.

With her passion for a healthy lifestyle, her professional cooking background and her love for kids, Tasmine Lica created Taters & Tots. She wants every parent to know that with a little work and the right meal plan, having a healthy eating child really is achievable!

Not only will Taters and Tots come and personally teach you how to cook fun and healthy meal plans for your kiddos but they also can be your littles ones own personal chef! Yep, if you haven’t heard that before, then you are hearing it now! This company can cater meals just for your littles ones starting from 3 months and up! From homemade baby food to weekly meal plans and at home classes this company can get your family eating healthy from the start.

That is their goal, to help families learn that babies & kids can begin their food journey from the first purees to the picky toddler years, in a healthy way. No kids menu required. Check out this delicious dish she taught us how to make. Even my husband enjoyed it! Healthy eating for the whole family!

Tators and Tots 4.jpg


Delicata Squash recipe 

2 medium-large delicata squashes

¼ teaspoon +1 pinch cinnamon

¼ teaspoon + 1 pinch allspice

3 tablespoons of coconut oil

2 tablespoons of agave

Tators and Tots 2.jpg


You’ll also need,

A kitchen spoon

2 sheet pans

Foil (optional)

Cutting board

A knife

A pastry brush (kitchen brush)

Tators and Tots 6.jpg


Preheat oven to 400.

Cover pans in foil (optional).

Heat coconut oil so it’s liquid (if not already so).

Brush both sheet pans with oil (if you run out of oil you can always use more).

On cutting board, cut each end off of squash to make a flat surface, then cut down middle.

Tators and Tots 7.jpg

Seeds-

Scoop seeds out and put on sheet pan number one (this is a fun job for your little ones!). Once on pan drizzle a little coconut oil, a pinch of cinnamon and allspice, toss together and bake for 5-10 mins or till golden brown.

Squash-

Now that the squash is cleaned, cut into small pieces, put pieces on sheet pan and brush with coconut oil, sprinkle rest of spices on top and put in oven for 10 mins. Remove squash, stir/or flip squash and drizzle agave on top, place back in oven for another 10-15mins until light/golden brown. ***The skin of this type of squash is edible!

Finish by sprinkling cooked seeds on top and enjoy!!

FullSizeRender.jpg

Americana Ice Cream Sandwich DIY Tray

4th Of July Ice Cream Sandwich 10.jpg

I love entertaining and something exciting and delicious is always on the menu. That is exactly how I came up with this fun DIY Dessert Tray for this Independence Day. Not filled with your ordinary cookies and brownies, this tray is catered to the whimsical and fun crowd! 

4th Of July Ice Cream Sandwich.jpg

So, entertain your guests with this creative colorful RED, WHITE & BLUE dessert! Have everyone gather round and make their own festive creation. I love the idea of getting people involved and the kids will absolutely love this but all the adults will too!

4th Of July Ice Cream Sandwich 6.jpg

Set up a tray of your favorite chocolate chip cookies (ours are from the local market and are always fresh baked!), a quart of the best vanilla ice-cream and a few colorful sprinkles and watch as they all enjoy! Include the ice-cream scoop and napkins and this dessert tray will be a hit!

4th Of July Ice Cream Sandwich 7.jpg

No-Bake Easter Garden DIY

Easter Garden DIY9.jpg

Everyone will be excited about this sweet creation! With no baking at all the children can create their very own edible easter themed garden. With rice crispy grass, Oreo cookie dirt and marshmallow chicks! 

Easter Garden DIY6.jpg

If you are looking for a fun and easy way to get into the Easter spirit try this craft with the kids and wow your guests!

This beautiful DIY no-bake craft is so easy and delicious. All you need are store bought items and some things you probably already have in your pantry. 
Here is what you'll need:

Easter Garden DIY.jpg
  • Rice Crispy Treats
  • Oreos
  • Peeps Candy
  • Green Food Dye
  • Small bowl of water
  • New paint brush or food safe basting brush
  • Plastic Baggie
  • Toothpicks (optional)
  • Cadbury Chocolate mini eggs for garnish
  • Plastic Easter eggs for garnish (optional)
Easter Garden DIY 1.jpg

First, start by preparing all the items... You will need to create a small bowl of water and food dye to create your paint! Mix a few drops of green food dye into room temp water. Use new or food friendly paint brushes. 

Easter Garden DIY 2.jpg

Then, lay out the rice crispy treats on papertowel or parchment paper. Have the children paint them to create the grass! Don't over saturate. Leave to dry. 

Easter Garden DIY 3.jpg

Then, add about 6-10 Oreo cookies to a baggie. This is the fun part! Have the kids smash the cookies and create the dirt!

Easter Garden DIY 4.jpg

Once the rice crispy treat is dry you can assemble your garden! For presentation purposes only (remove before eating) place a tooth pick in the bottom of your peeps. Then place onto the rice crispy treat. Repeat this step for all peeps and rice crispy treats. (*Note if you choose not to use the toothpicks you can simply place the peep on top of the crispy treat while it is still a bit damp. The sugars will form a small bond when they dry)

Easter Garden DIY 7.jpg

Finally scatter the Oreo crumbs onto your platter of choice. Then arrange your peep and rice crispy treats on top to create the garden. Finish by adding some chocolate and/or plastic eggs, enjoy!

Easter Garden DIY 8.jpg

Make the best BACK-TO-SCHOOL Lunch

Lunch box ideas.jpg

Packing lunches is NOT my favorite thing to do... and I bet you can think of a million other things you'd rather do also.

But seeing the happy faces of your most precious little ones when they see this lunch will make all that hard work totally worth it.

best lunch box idea 8.jpg

This year I decided I was going to up the home lunch game by making it way more fun for everyone. I also, have another lunch to pack with Brent starting his 2's program at the local nursery. And that's exactly why this lunch is perfect. Each piece is bite size and totally toddler friendly but just as much fun for all ages.

best Lunch Box.jpg

So make it a bento box! I love this lunch box by YumBox because it has all the little spots for all the makings of a well balances lunch. When I pack a lunch I sometimes forget to pack all the food groups but with this box, it gives you all the spots to add just the right amount of each; protein, grains, fruits, veggies & dairy.

best lunch box idea.jpg

And to make it even more fun I used these adorable little shaped food cutters to make each bite taste even that much better! Because they are in heart, start and doggie shapes to name a few!

best lunch box idea3.jpg
best lunch idea.jpg
best lunch box idea4.jpg
best lunch box idea5.jpg
best lunch box idea2.jpg

Try foods like fruits and cheese that are easy to eat in these little bit sized shapes. I also tried grilled chicken which helps them get a little protein into their lunch. But you can also use eggs or cold cuts. And for the more adventurous eaters try tofu or seaweed.

best lunch box idea7.jpg

I also love these little animal shaped forks and chop sticks that will make picking up these nibbles easier. Plus the kids love using them because they are so cute.

Hope these tips help you make lunches yummier and more exciting for your little ones!

best lunch box idea 9.jpg

Sweet Shape Sorting Potato Bites

My kids are always welcome in the kitchen and although I really hate cleaning up their daily messes, it never holds me back by letting them make a huge mess in the kitchen.

This time I let the kids use metal cookie cutters to make this yummy sweet potato treats!

I have been taking them to kids cooking classes since they were tiny and it's still something they love. Seeing them being interested in food and having fun preparing it is something every mom dreams of for their picky eaters. I know that if my kids make something, then they will try eating it. They don't always like it, but they will at least try it. And that's half the battle, right?!

I now have a new little mouth to feed and as Brent enters toddler-hood, he is getting better at feeding himself and is exploring more types of food than just baby food puree's and simple dishes.

Check out what we cooked up recently and how easy and nutritious these little nibbles are...

Brent loved sorting his shapes and eating them too!

How to make:

  1. Start by slicing the sweet potato into 1/4 inch slices.
  2. Then lay the pieces flat and use metal cookie cutter in all different shapes.
  3. Organize the shapes on a cookie sheet
  4. Preheat oven using the broiler on low to medium heat
  5. Coat the shapes with extra virgin olive oil and sea salt
  6. Broil on each side for about 8 minutes
  7. Cool and serve!

Kids Cooking with Tiny Turnip Kitchen

My kids just love cooking and getting their hands dirty!

I have been taking them to kiddie cooking classes since they were super little and they still love pouring and mixing ingredients. The best part is they always try new foods!! And that makes me so happy.

That is why when Andrea Kapner, founder of Tiny Turnip Kitchen, offered to do a private cooking class just for us we couldn't refuse. Check out what she taught the kiddies to make! They loved every minute of it. 

But the best part is that I didn't have to drag all three kids on the subway to get to this cooking class like I had to do in the past. Tiny Turnip Kitchen comes to you. If you live in or around Manhattan, she can travel to you. She does private cooking classes as well as larger groups. 

So we grabbed a friend to join us as well! And he loved getting his hands in the mix just as much as my kids. 

Andrea taught the kids how to use the kid safe knives properly and about nutrition. She also can develop recipes that cater to children with food allergies. So you won't have to worry if your little one has sensitivities to certain foods.

Here are the recipes from our cooking class! They were so yummy...

Carrot Cake bites, Allergy free (nut, gluten, and dairy free)

Makes about 15

KIDS COOKING11.jpg
  • 2 cups unsweetened shredded coconut, 1/2 cup reserved to rolls carrot cake bites in
  • 2 small carrots, shredded
  • 6 medjool dates, seeds removed
  • 2 tablespoon sunflower seed butter (homemade recipe below)
  • 1/4 teaspoon cinnamon
  • 1/2 teaspoon concentrated natural vanilla extract
  • pinch of salt
  • 1-2 tablespoons honey
  • 1/4 cup chocolate chips
  • 1/4 teaspoon salt
  • 1/2 cup gluten free rolled oats or brown rice puffs
  1. Place the ingredients into your food processor and blend at high speed until the mixture is broken down and sticking together when pressed. 
  2. Use your hands to shape the mixture into 1 inch balls, or
  3. Roll each in reserved coconut flakes.

*To make sunflower seed butter add 1 cup of sunflower seeds, 1 tsp on salt, and 1 tablespoon of coconut oil to a food processor. Blend until a smooth consistency (about 3-4 minutes).

Veggie pizza empanadas: 

Dough

2 1/2 cups flour

6 tbs of butter

2 tsp salt

1/2 cup ice cold water

Veggies pizza filling

5-8 oz fresh spinach, stems removed, washed, chiffonade

8 oz whole milk mozzarella cheese, or similar white cheese such as queso quesadilla, shredded or crumbled

2 cups of tomatoes cut in half

1/2 cup of sweet pepper, yellow, red, or orange, diced.

Pizza sauce, or tomato sauce.

Egg wash:

1 large egg

1 tablespoon water

Make the dough: 

Add flour, salt, and butter to a food processor and mix until the dough is flaky. While the motor is running slowly add cold water until the dough comes together, add more water if needed.Wrap the dough in plastic and refrigerate for at least 2 hours.

Assemble the empanadas: Preheat the oven to 375°F. 

Tear off pieces of dough to roll about 12 large or 24 small balls of dough. Using a rolling pin, roll out dough balls on lightly floured surface into circles with a 3/8-inch thickness. Just don’t roll the dough too thin because this filling (unlike the meat filling in the Argentine empanadas) can expand and burst the pastry if the dough is too thin or the empanada is over-stuffed with filling. Place cheese, veggies, and 1 tbsp of tomato sauce in circle (depending on the size of the empanadas you are making). Fold over and press edges firmly to seal, use a fork to seal the edges. *Optional egg wash, beat egg and water in small bowl. Brush egg wash over each empanada.Place empanadas on cookie sheet and bake until golden brown, 20-25 minutes. Makes 12 large or 24 small empanadas.

To start your kids cooking today, contact Tiny Turnip Kitchen or email Andrea directly at tinyturnipskitchen@gmail.com.

DIY Nut Milk Recipe

I've heard about people making their own nut milks. So, I reached out to my friend and health chef guru, Manya Williams, for all the details on how to make it!! 

Watch Manya's video tutorial. She gives so many amazing details that you won't want to miss this... Her secret recipe revealed!

I am a huge fan of homemake almond milk (it's WAY better than any store bought kind)... add a little cinnamon, blend it into a smoothie, there are just so many ways you can enjoy this yummy healthy drink! 

Manya, is also currently featured in 10 Ways to Make 2017 The Best Year Yet. Check it out!

Holiday Ice-cream Cookie Sandwich

When the holidays roll around, I crave all things festive. Just imagine the smell of warm gingerbread cookies in the oven! Then, match that with frozen pumpkin flavored ice-cream. It's just a perfect combination. Don't you think!!?!

The kids just love helping in the kitchen and so they were excited when I asked them to help me make dessert. I cooled the cookies for only a few minutes so they were still nice and toasty. Then we scooped out the frosty pumpkin ice cream and topped it off with another warm cookie. 

The combination is dreamy!

Here's how we made it:

I used the Taste Of Home recipe for the Soft Ginger Cookies & bought Pumpkin Pie Gelato by Talenti.

Ingredients:

  • 3/4 cup butter, softened
  • 1 cup sugar
  • 1 large egg
  • 1/4 cup molasses
  • 2-1/4 cups all-purpose flour
  • 2 teaspoons ground ginger
  • 1 teaspoon baking soda
  • 3/4 teaspoon ground cinnamon
  • 1/2 teaspoon ground cloves
  • 1/4 teaspoon salt
  • Extra Sugar

Directions:

  1. In a large bowl, cream butter and sugar until light and fluffy. Beat in egg and molasses. Combine the flour, ginger, baking soda, cinnamon, cloves and salt; gradually add to the creamed mixture and mix well. 
  2. Roll into 1-1/2-in. balls, then roll in sugar. Place 2 in. apart on ungreased baking sheets. Bake at 350° until puffy and lightly browned, 10-12 minutes. Remove to wire racks to cool. Yield: 2-1/2 dozen. 

Then, let the cookies cool for about 5-10min. 

Let the kids scoop the pumpkin ice-cream or gelato onto the bottom of one cookie. Then have them place another cookie on top. And ENJOY!

*Tip- If ice-cream is starting to melt quickly, place back into freezer for a few minutes.
 

Creepy Crispy Treats

Ok, these are the most delicious crispy treats I've ever made. My secret recipe is revealed!!

My husband asked me how I made the creepy crispy treats so chewy, gooey and delicious.. as he was going back for seconds!

So, I may make the best rice crispy treats around (well, I stole the recipe from my mom!! shh) and the secret is BUTTER! So, you can't just melt the butter like most people do when making rice crispy treats. The secret is browning it! It brings out the richness carmel flavoring of the butter which makes my (my mom's) crispy treats the best around.

Check out how to create the yummy gummy goodness! 

Here's the easy recipe and will take you less than 12 min to make. Did anyone say last minute party food? Well, you can be prepared with this super easy to follow recipe.

***For these crispy treats I used Coco Pebbles instead of Rice Crispy cereal. They already had the dark color I desired and my kids LOVE Coco Pebbles. 

  1. Melt 1 stick of salted butter in a large pot over high heat. Let it brown.
  2. Once the butter starts to brown add a bag of the small marshmallows. 
  3. Place the lid on the pot and reduce the heat to low/simmer
  4. Let the marshmallows melt (you can check to see if they've grown in size)
  5. Once the marshmallows are soft and look like they've expanded, you will add 1/2 box of Coco Pebbles.
  6. Combine ingredients.
  7. Turn off heat.
  8. Add about another 1/4 box of the Coco Pebbles.
  9. Combine. 
  10. If you want super marshmallow-y treats (like I do!) then you shouldn't need to add anymore cereal 
  11. Watch out! The mixture is hot.
  12. Add the mixture to cupcake molds. *Spray the molds with nonstick spray 
  13. Decorate your Creepy Crispy Treats with Halloween sprinkles available at Michaels.com
  14. Let cool for 10 min in the fridge.
  15. Serve and ENJOY! So dense and gooey!!

No Bake Chocolate Chip Cookie Dough Truffles

I spent tons of money on gimmicky kids baking products for my daughter. She loves to make and bake all types of sweets. Her weakness for licking the spoon is unparalleled. So it's hard to find recipes that are safe to eat raw due to the raw eggs. So I set out on a mission.. and I think you're all going to love it!

Also, stay tuned for more kid friendly recipes on my blog.

This recipe is so quick and easy, it's perfect for the kids to do alone or with your supervision. There really is no baking, just measuring and mixing. And who doesn't love raw cookie dough, right?!! 

Start with combining:

  • 1 cup soft butter
  • 1 1/2 cups brown sugar 

Then add:

  • 2 teaspoons vanilla extract
  • 1/2 teaspoon kosher salt
  • 1 tablespoon water
  • 1 3/4 cups flour
  • 1/2 cup mini milk chocolate chips

Combine all ingredients.

We like serving two ways... take your pick!

  1. Roll into bite-size balls.  Use cake pop sticks to serve. Refrigerate. Enjoy!
  2. Pack into small tupperware containers and leave in the refrigerator until chilled. Eat with a spoon and enjoy!

Pumpkin Muffins

When the Fall hits it's like we just can't get enough of the pumpkin flavors! I mean from coffee to cakes the smell and flavor of pumpkin evokes a feeling in us that reminds us that fall is the best season EVER or it could make you think of cozying up in front of a large fire. Whatever the case is pumpkin is a must have in fall.

Here is a quick and easy DIY pumpkin muffin recipe that the kids and yourself will be drooling over. 

Start with Pillsbury Quick Pumpkin Bread mix from the box.

Instead of making bread, follow the secondary instructions to make the muffins. You'll be using milk instead of water. ***There are a few other differences but that's the major one.

Then add:

  • 1/4 cup pumpkin puree (from the can) and
  • 1/3 cup apple sauce. **This will make the muffins so moist and delicious. 

Then in a separate bow mix:

  • 1/4 cup sugar
  • 3 tbls flour
  • 2 tbls butter
  • sprinkle the tops of muffins
  • Bake for 20 min at 375 degrees

They are best served while they are still warm. Cut muffin in half and add a small slice of butter. It will melt in all the little crevices and bring out of the sweet and savoriness of the muffins. Enjoy!